Every April, somebody on my street turns on their sprinkler system and finds a geyser in the side yard. It's almost never bad luck. It's a line that went into winter with water in it. Water expands by about 9 percent when it freezes, and PVC pipe, a brass backflow preventer, and the copper tube inside an outdoor faucet don't stretch 9 percent. Something gives, and you don't find out until you turn the water back on.
The October checklist gave this job one line and a promise. This is the full version: the outdoor faucets (fifteen minutes, all DIY), the sprinkler system (where DIY vs. pro is a real question), and the odds and ends like drip lines and rain barrels.
Why outdoor water splits pipes (and why you find out in spring)
Ice starts in the coldest spot, where a pipe comes out of the ground or through the wall, and seals it like a cork. As it grows, it squeezes the water trapped between the ice and the next closed valve, and that pressure has nowhere to go, which is how a spigot splits a few inches inside the wall. Nothing leaks all winter. Then you open the valve in spring and the water finds the crack. The fix is always the same: get the water out of anything that sits in the cold, and leave a path open so nothing is trapped between two closed valves.
When to do it: the forecast, not the calendar
The deadline is the first hard freeze, which in practice means the first night the forecast drops into the low 20s. A light frost at 31 degrees won't reach a buried sprinkler line, but the parts above ground (the backflow preventer, the outdoor faucets) sit right in it. Your average first frost date is a good early warning, and the planting calendar looks it up by ZIP code. Aim to be done a week or two before it.
If you seeded the lawn in September, the new grass still needs water until it's been mowed a couple of times (the fall lawn care guide has the schedule), so keep one hose connected until then. And if you're hiring the blowout, book it now. The first cold snap sends everyone who waited to the phone on the same morning.
Step 1
Disconnect, drain, and store every hose
This ten-minute job prevents the most damage. Unscrew every hose, splitter, and battery hose timer from every outdoor faucet, drain them, and hang them in the garage. A hose attached to a faucet holds water in the faucet. On an ordinary spigot that's a frozen spout. On a frost-free spigot it's worse, and it's the most common way those split.
Step 2
Shut off and drain the outdoor faucets
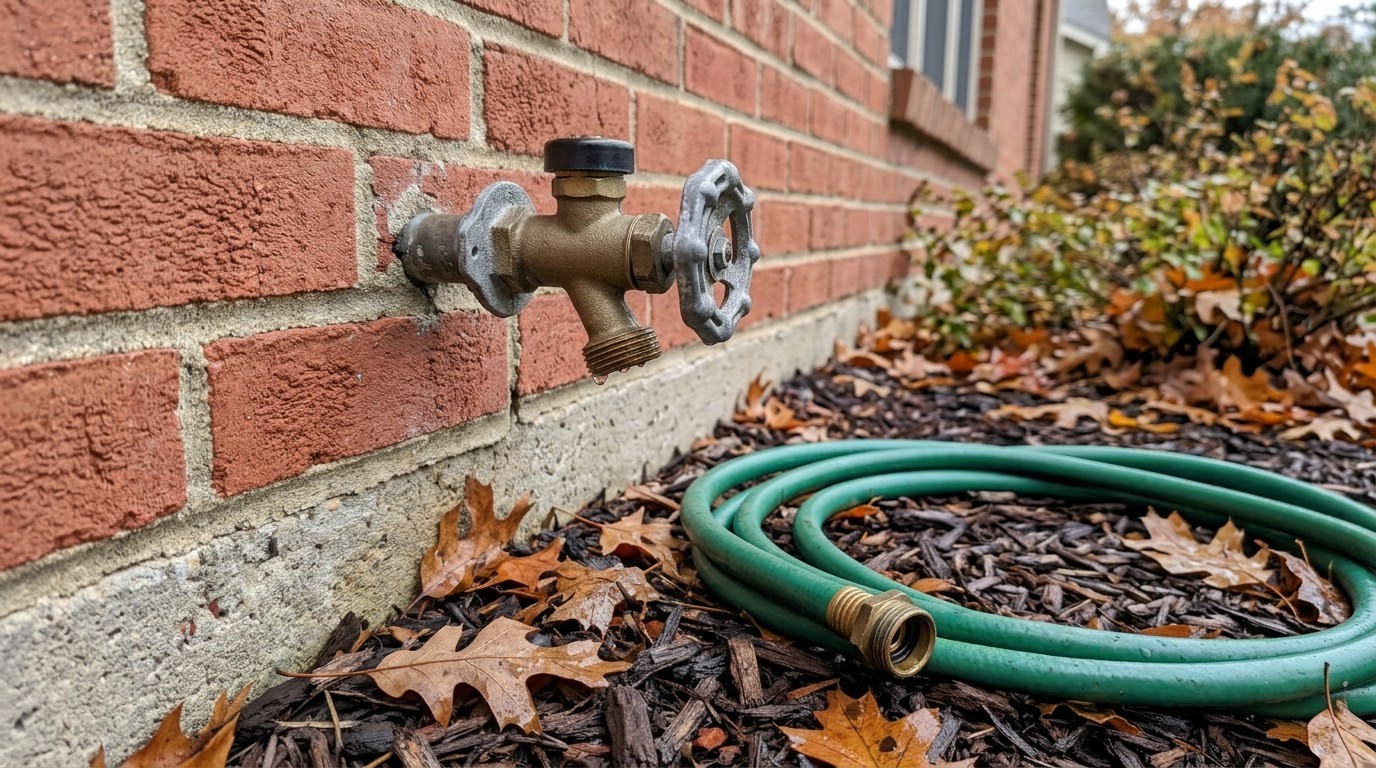
Outdoor faucets (hose bibs, sillcocks, spigots: same thing) come in two kinds. A standard hose bib is short and stubby and depends on a separate shutoff valve indoors. A frost-free faucet has a long body that runs back into the wall, with the handle turning a rod that reaches all the way inside.
Standard hose bib with an interior shutoff. Find the shutoff inside, usually in the basement or crawlspace on the pipe heading toward that wall. (If you don't know where your shutoffs are, the move-in checklist walks through finding every one.) Then:
- Close the interior shutoff all the way.
- Open the outside faucet. You'll get a short burst of water, then nothing. Leave it open all winter.
- Open the bleeder cap. Most of these shutoffs (often called stop-and-waste valves) have a small brass cap on the side. Put a bucket under it and unscrew it, and the pipe between the valve and the wall drains out. When it stops dripping, screw the cap back on so it doesn't get lost.
Watch the faucet, not the valve
After you close the shutoff and open the outside faucet, give it a minute. A burst and then dry means the valve is holding. A trickle that never stops means the shutoff isn't sealing, and that pipe is still full of water heading into January. An old valve that won't close is usually a plumber call; the DIY vs. plumber guide covers where that line sits. If the outdoor faucet drips when it's closed, that's the worn-washer problem from the leaky faucet guide.
Frost-free sillcock. The actual valve seat sits at the back end of a long tube, inside the wall where the house keeps it warm. When you shut the handle, the water in the tube drains out the spout, so nothing is left sitting in the cold. They usually don't need an interior shutoff, as long as two things are true:
- Nothing is attached. A hose or splitter blocks the spout, the tube can't drain, and the water freezes and splits the tube inside the wall. You find out in spring when you turn it on and water comes out the spout like normal and also runs down the inside of the wall.
- It slopes down toward the outside. Open it, close it, and watch: water should run out for a few seconds and stop. If it dribbles for a long time or visibly tips back toward the house, it may not drain fully. That's a spring fix for a plumber, and meanwhile closing an interior shutoff, if there is one, is cheap insurance.
Faucet covers are a backup, not a substitute. An insulated faucet cover traps a little of the house's heat around the spigot, which is worth a few dollars on a faucet with no interior shutoff. It can't save one with a hose still attached through a week of single digits. A standard hose bib with no shutoff inside is worth fixing: a plumber can add a shutoff or swap in a frost-free sillcock for far less than a burst pipe in a finished basement costs.
Step 3
Shut off the irrigation water and park the controller
The sprinkler system has its own shutoff, usually a valve where the irrigation line splits off the house supply, often in the basement near the water meter (in some areas it's in a valve box in the yard). Close it. Then set the controller to off, or to rain mode if it has one, which stops watering but keeps the clock and your zone programs for spring.
The three ways to empty a sprinkler system
- Manual drain valves at the low points of the lines. You open them, the water runs out into a pocket of gravel, and you close them in spring.
- Automatic drain valves, spring-loaded valves at the low points that open whenever the pressure drops. They drain the zone lines, not the main line.
- Compressed-air blowout. A compressor pushes air through one zone at a time, and the water goes out through the sprinkler heads.
Drain valves only get the water that can run downhill to them, and a lawn is never quite as sloped as the installer's plan assumed. Colorado State University Extension is blunt about it: don't trust manual or automatic drain valves; blow the system out with air. Where the ground doesn't freeze, ask a local irrigation company what's standard.
Step 4
Blow out the lines, zone by zone
Read this before you rent the compressor
Compressed air in a pipe full of water is stored energy. Wear eye protection the whole time. Never stand over a sprinkler head, a valve box, or the connection while air is flowing; heads can pop out of the ground, and grit comes out with the water. Keep the pressure at or below about 50 psi for flexible black polyethylene pipe and 80 psi for rigid PVC, the limits Colorado State Extension gives. If you don't know what pipe you have, use the lower number. And always have a zone open before the air goes on, so the compressor never pushes against closed valves.
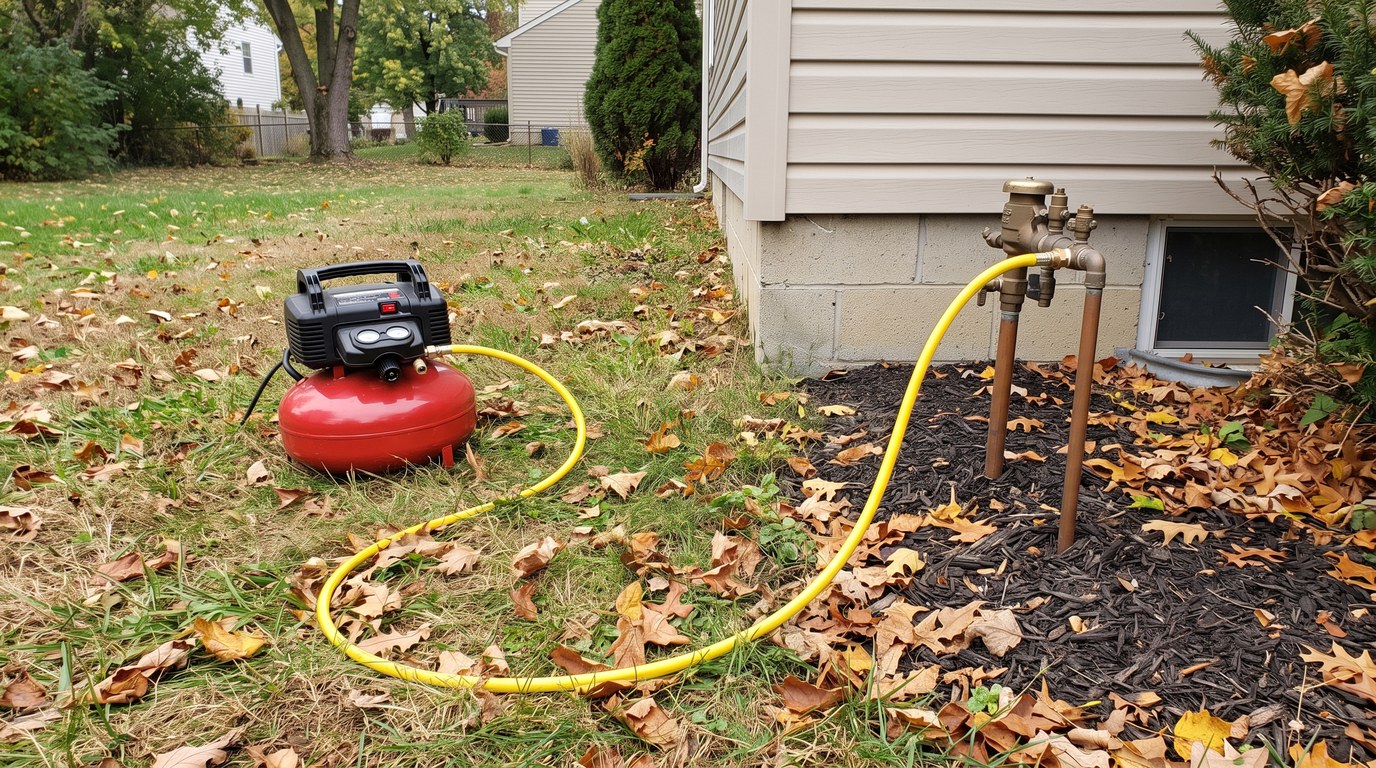
Here's the part that surprises people: pressure isn't what gets the water out. Per Colorado State, air volume, in cubic feet per minute (cfm), pushes the water; pressure just overcomes friction and elevation. The pancake compressor in the garage shows plenty of psi on the gauge, but it empties its little tank in seconds and can't keep up, and a slow push leaves water in every low spot. The University of Minnesota's turf program says consumer compressors generally can't supply the cfm a system needs. Contractors use towable compressors in the 185 cfm class, and you can rent one if you have a hitch.
- Close the two ball valves on the backflow preventer so air doesn't go backward through it.
- Connect downstream of the backflow preventer, at the blowout port if your installer put one in. A sprinkler blowout adapter turns a hose-thread port into a fitting your air hose snaps onto. Never push air through the backflow preventer itself.
- Set the regulator at or a little under your pipe's limit.
- Open one zone at the controller, starting with the one farthest from the connection, then open the air valve slowly. The heads spit water, then sputter, then blow mist. When it's just mist, move on.
- Go through every zone, then do it all again. Colorado State recommends blowing each zone out twice. Water from higher lines settles into lower ones between passes, and the second round gets it.
- Don't park the air on a dry zone. Colorado State warns that air moving through dry pipe builds friction heat that can damage the system, and plastic sprinkler gears that rely on water to stay cool can melt.
- Shut the compressor off and bleed the pressure before you disconnect anything.
DIY or hire it out?
The faucets are always DIY. The blowout is the one real decision here, and for most homes my answer is the one the October checklist gave: hire it. Prices vary by region and zone count, so get a couple of local quotes, and ask whether the fall visit includes spring startup.
Step 5
Drain the backflow preventer and leave it at 45 degrees
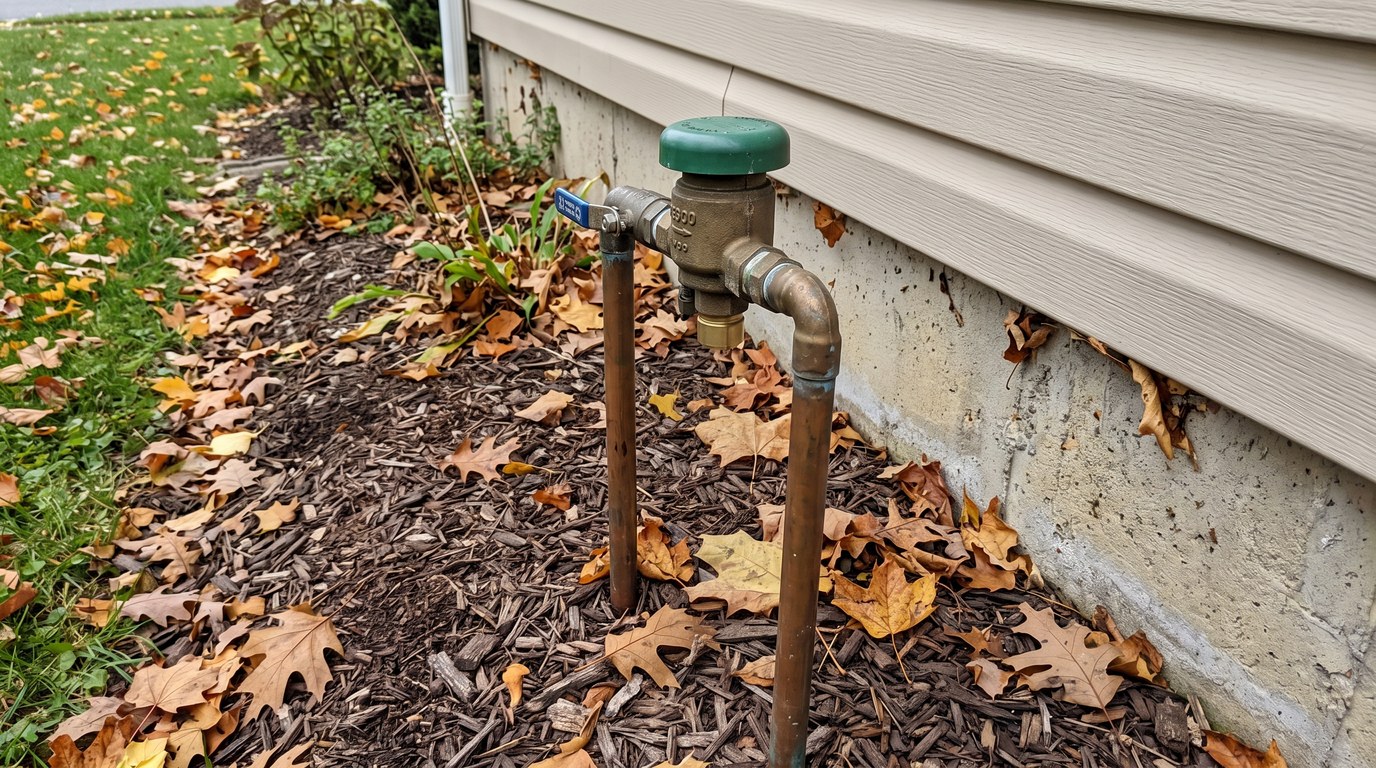
The backflow preventer is the brass assembly near the house that keeps lawn water from being siphoned back into your drinking water. Most homes have a pressure vacuum breaker (PVB) on two copper risers about a foot above the ground; some have a larger reduced pressure zone assembly (RPZ) with a relief port on the bottom, or a double check assembly in a box in the ground. All of them hold water, and all of them are expensive to replace.
- Open the test cocks, the small valves on the side of the body (usually a flat screwdriver turns them), to let trapped water drain.
- Leave the ball valves at about 45 degrees. Colorado State and the University of Minnesota give the same advice: set the ball valves (and test cocks) half open, at roughly a 45 degree angle, for the winter. A ball valve left fully open or fully closed can trap water inside the ball.
- Insulate it if it's above ground. A backflow preventer insulation cover slips over the assembly. On an RPZ, don't block the relief port.
Some water utilities in cold climates publish their own backflow winterizing instructions, and if yours does, follow them. In spring, the ball valves should be fully closed when you turn the water back on, then opened slowly. The spring checklist covers the zone-by-zone startup.
Step 6
Drip lines, rain barrels, and the rest of the yard
- Drip irrigation: disconnect it from the spigot, open the end caps on every line, and let it drain. The filter, pressure regulator, and timer have small plastic housings that crack when they freeze, so bring them indoors. The drip irrigation guide shows where each piece sits, and tubing on raised beds can stay put once it's drained. If drip is part of an in-ground system, tell whoever does the blowout, because drip tubing wants far less pressure.
- Rain barrels: drain them, disconnect them, and store them upside down or indoors. Put the downspout extension back so snowmelt lands away from the foundation; the gutter guide covers where downspouts should discharge.
- Nozzles, splitters, and the pressure washer come inside with the hoses. The outdoor gear winterizing guide covers the rest of what lives on the patio.
- Out of scope here: pools, hot tubs, well pumps, and pumped fountains each have their own procedure.
Outdoor Water Questions
Do frost-free spigots need the inside valve closed? Usually not, if the faucet is sloped right and nothing is attached. Closing an interior shutoff, if you have one, doesn't hurt and covers you if the faucet isn't draining the way it should. The hose is the part that isn't optional.
A hard freeze came early and I haven't blown out the system. Is it ruined? Probably not. One cold night rarely freezes pipe buried under the lawn; the exposed backflow preventer is what's most at risk. Shut the irrigation water off, look the backflow preventer over for cracks, and get the system blown out on the next mild day.
The 15-Minute Version
No time today? Before the first night in the low 20s: take every hose off every faucet, close the interior shutoffs and open the outside faucets, and call to book the blowout. That covers the split spigot inside the wall and the cracked backflow preventer, the two expensive ones.
The fall home maintenance checklist puts the rest of the season in deadline order, and the free printable fall checklist is the one-page version for the fridge. If this is your first fall in the house, the free worksheet pack from the First-Time Homeowner's Handbook includes a maintenance log, a good place to write down where the shutoffs are and who did the blowout, so next October takes half the time.