Last winter I held a stick of incense next to my front door on a windy day and watched the smoke get yanked sideways like a tiny weather vane. That little stream of cold air I was paying to heat had been there for years, and I had no idea. It took about four dollars and ten minutes to fix — a roll of foam tape, a pair of scissors, and one slightly embarrassed homeowner.
Weatherstripping is the cheapest energy upgrade in the house, and you'll feel the difference. Done right, the same trick that stops cold air sneaking in during January stops hot air sneaking in during July — which is the actual point of doing it now, before the AC has to fight that war all summer.
Before You Start
This is a genuinely no-risk job. No power tools required for most of it, nothing to wire, no warranty to void. The only way to waste money is buying the wrong type of weatherstrip for the gap you're sealing — which Step 2 fixes.
Step 1
Find the Drafts
Pick a windy day and go hunting. The cheapest detector you'll ever own is a lit stick of incense — hold it slowly along the edges of every exterior door and window frame, and where the smoke pulls sideways, you've got a leak. No incense? A slightly damp hand works almost as well; you'll feel the cold (or hot) thread of air on the wet skin.
Mark each leak with a small piece of painter's tape as you go. By the time you've walked the house you'll have a map. In a typical home, the biggest offenders are the front door bottom, the sides of double-hung windows, and any door that connects to an unconditioned space (garage, attic, basement).
Step 2
Pick the Right Weatherstrip for the Gap
This is the single most-skipped step, and the reason most DIY weatherstripping fails within a season. There are four common types, and each one is designed for a different shape of gap. Use the wrong one and it'll peel, compress, or just sit there doing nothing.
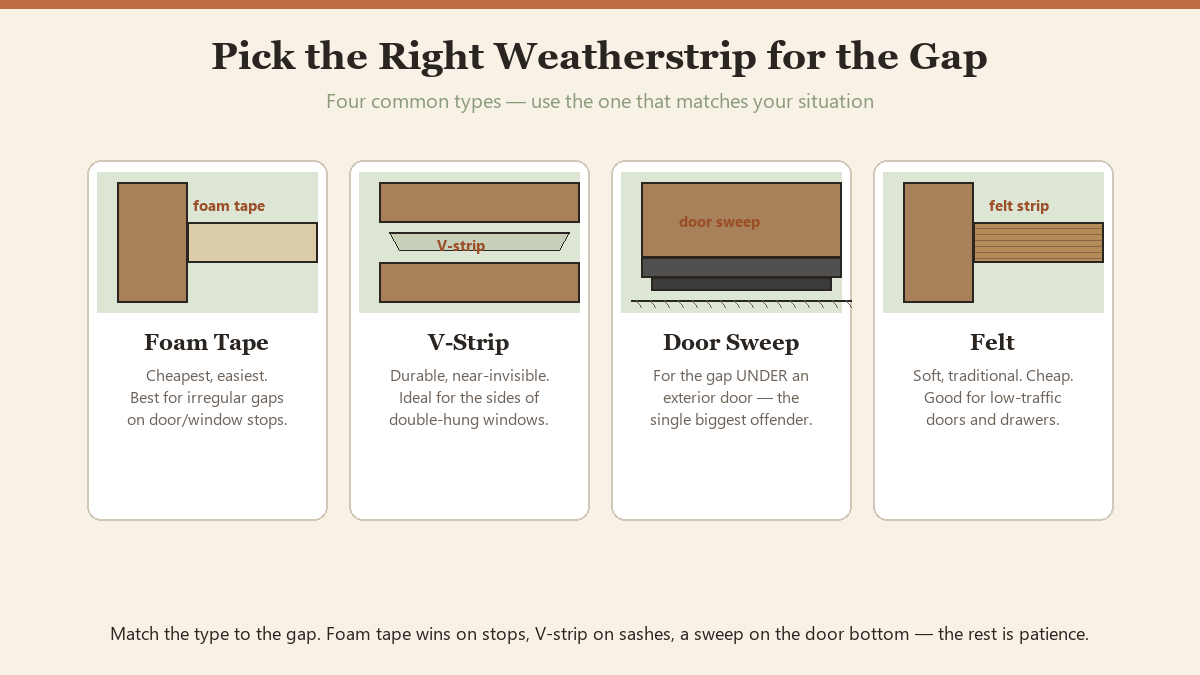
- Foam tape — cheapest, easiest, best for irregular gaps along door and window stops where the door or sash closes against the frame. Adhesive on one side, foam on the other. The default for most jobs.
- V-strip (tension seal) — thin plastic or metal folded into a V. Springs open under pressure to seal a sliding gap. Ideal for the sides of double-hung windows. Lasts years, near-invisible.
- Door sweep — a strip of rubber or bristles screwed (or stuck) to the bottom of an exterior door. The single biggest air leak in most homes is the gap under the front door, and this is the only thing that fixes it.
- Felt — soft, traditional, very cheap. Compresses easily so it's best for low-traffic doors and drawers, not heavily-used exterior doors. Wears out faster than foam.
Pick by the gap, not by the price. A $4 foam tape doing the right job beats a $20 V-strip doing the wrong one.
Step 3
Clean the Surface
Adhesive weatherstrip lives or dies by how clean the surface is. Years of dust, finger oils, and old paint flakes will defeat a brand-new strip in a single season. Spend two minutes wiping down each spot before you stick anything to it.
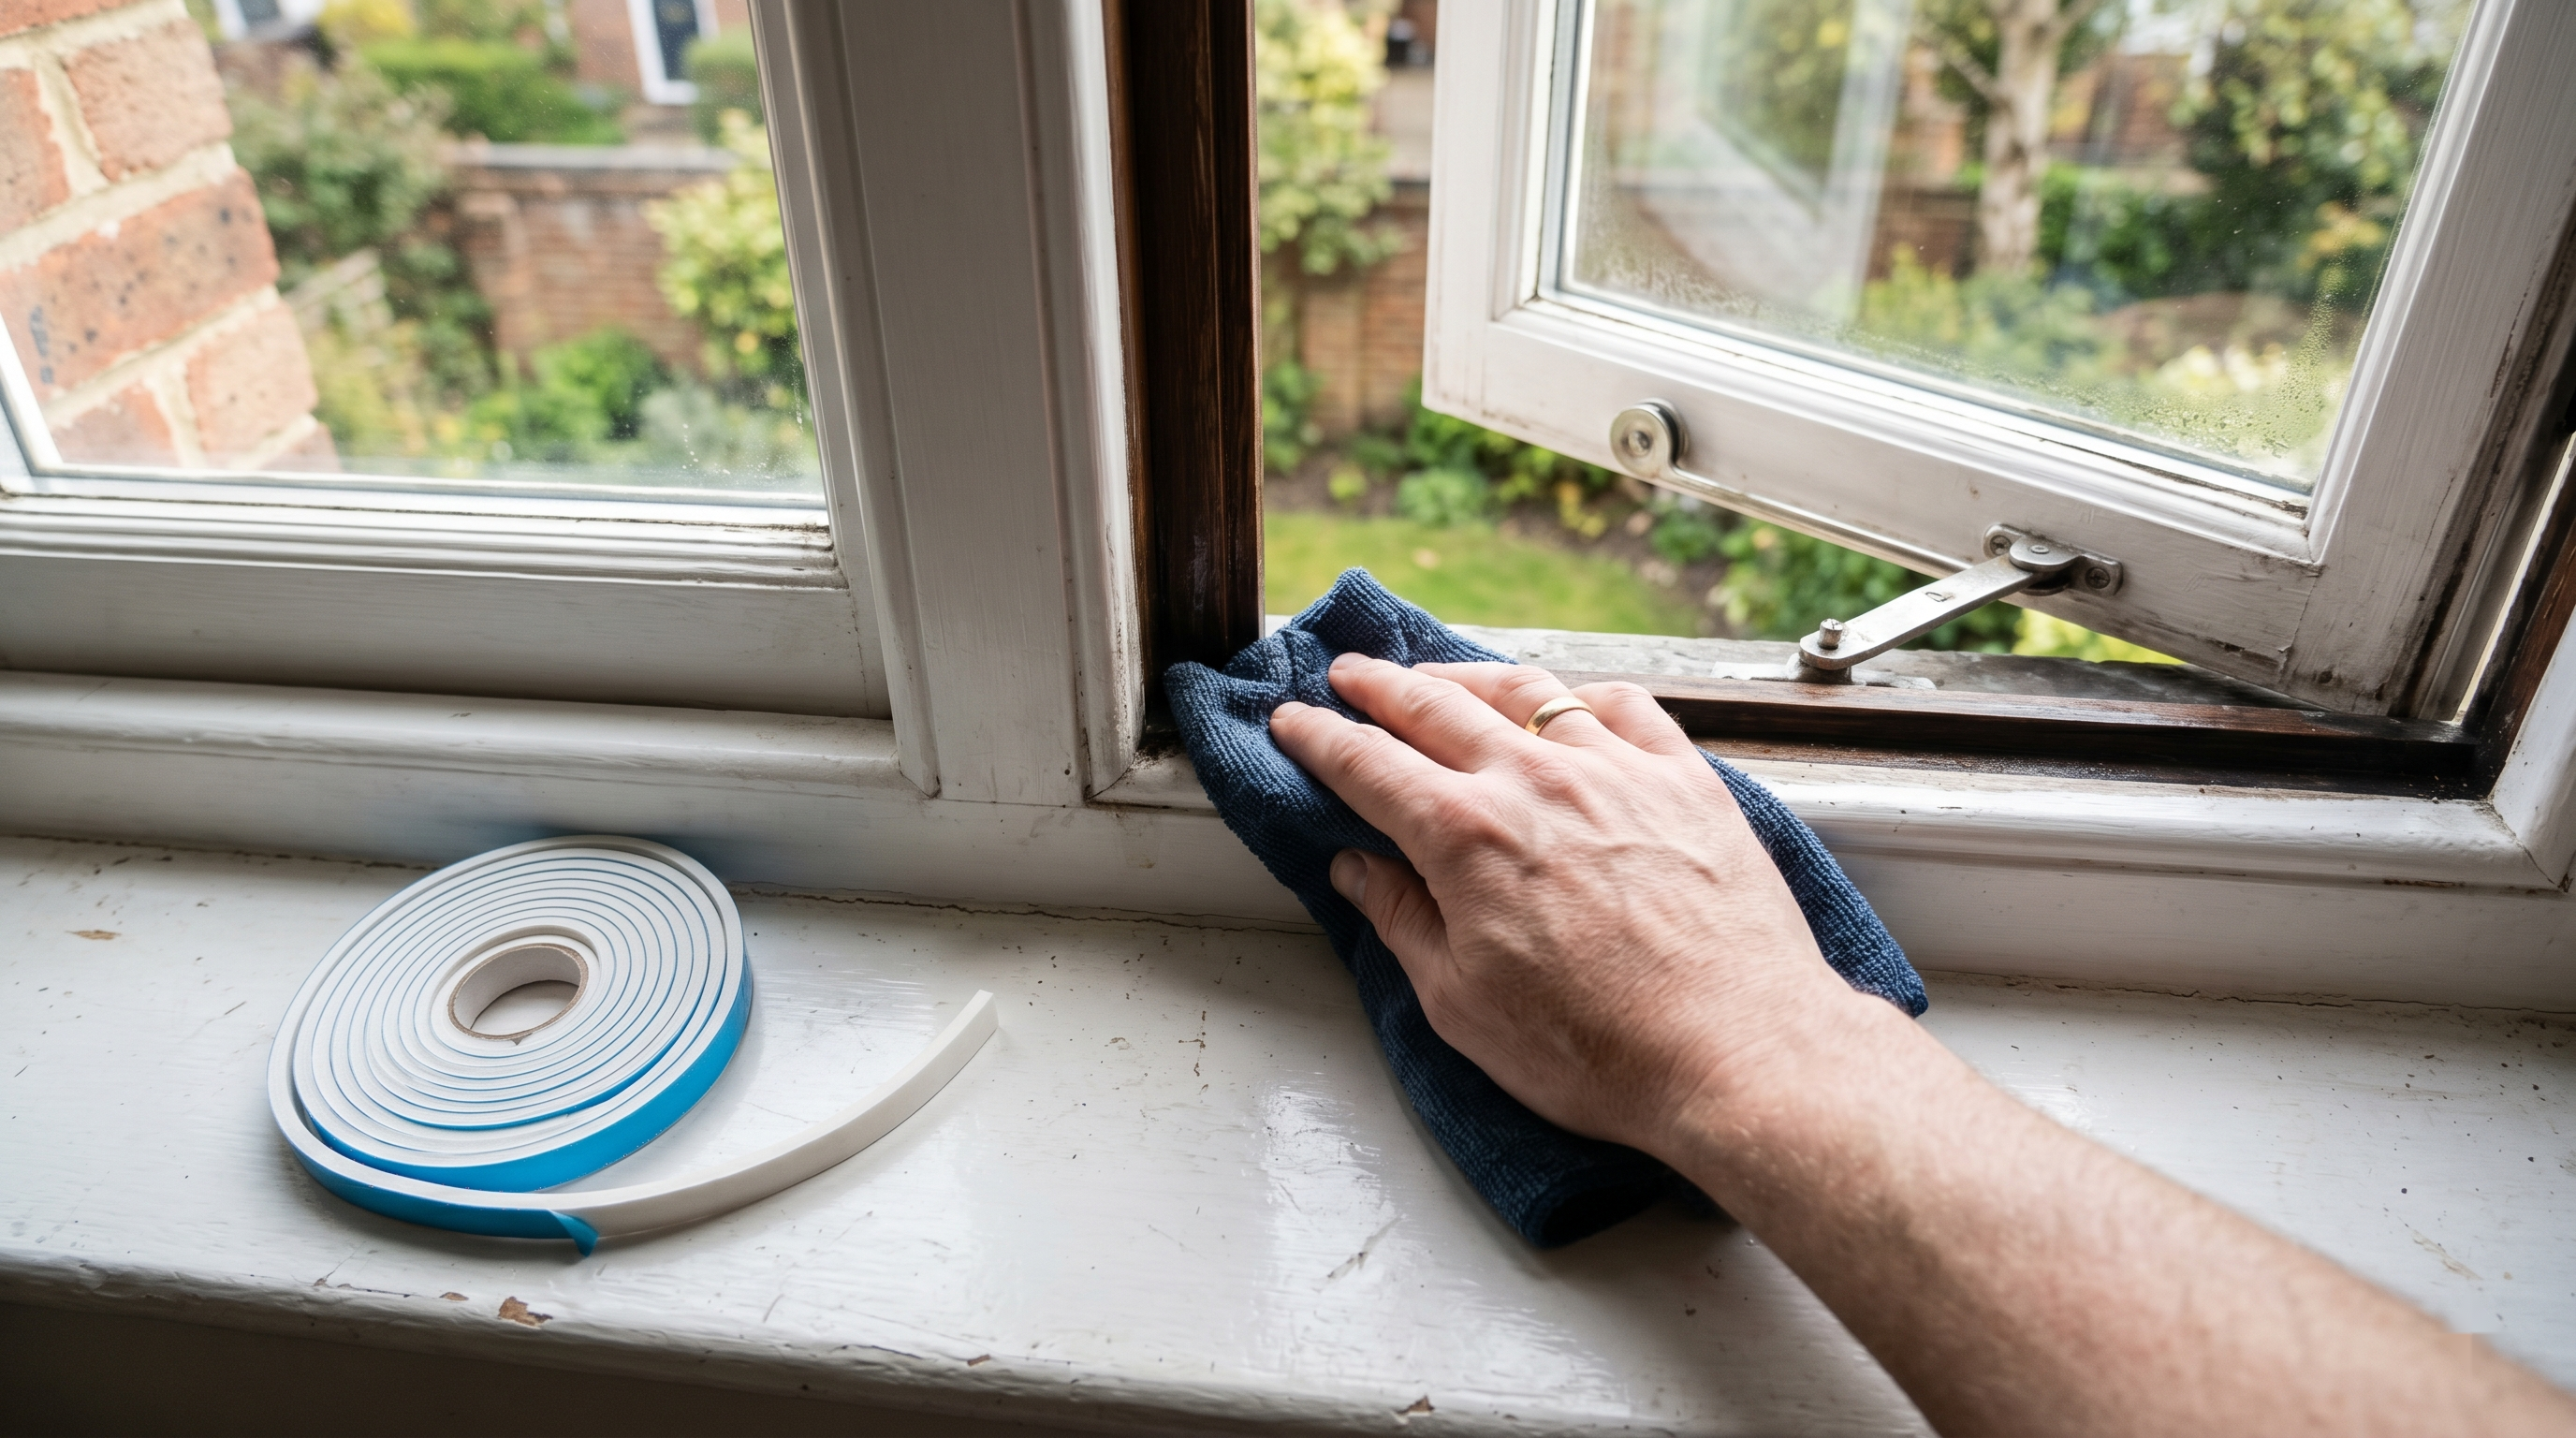
A damp microfiber cloth handles most of it. For greasy doors (a kitchen back door, say), follow with a quick wipe of rubbing alcohol or a degreaser. Let everything dry completely before you apply weatherstrip — wet wood plus adhesive equals a strip that falls off in two weeks.
Step 4
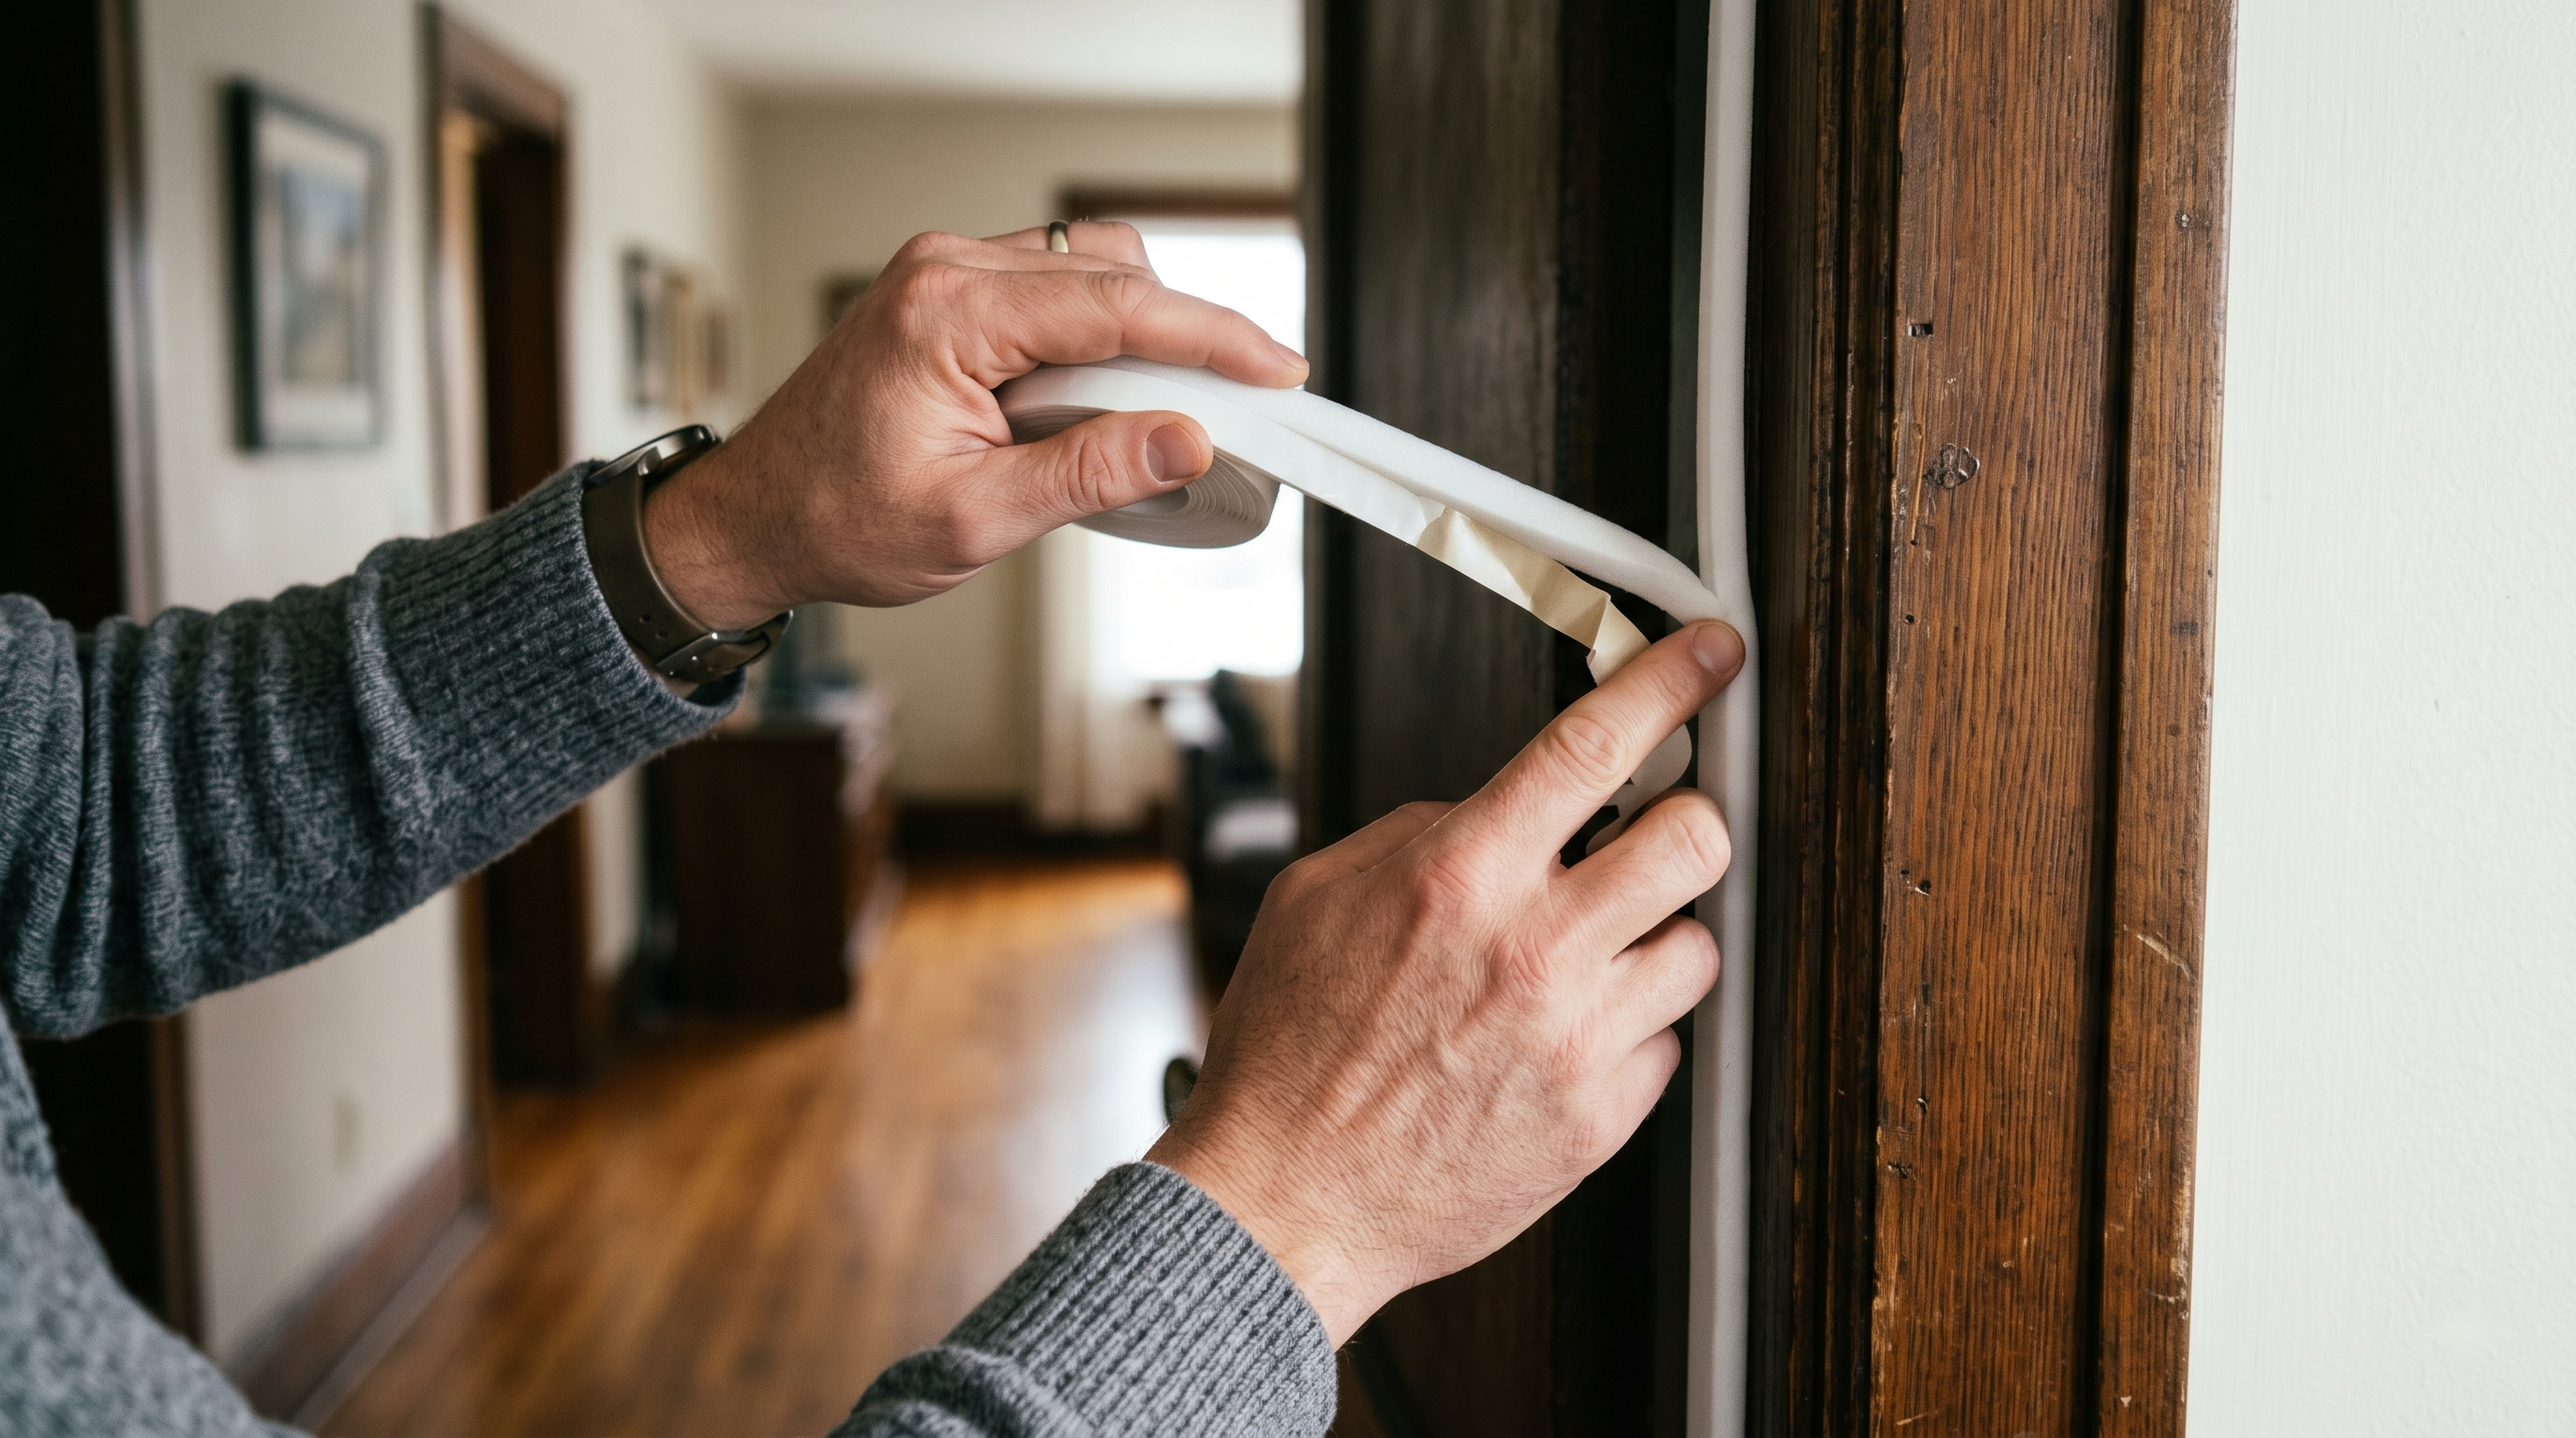
Apply Foam Tape Where Doors and Windows Close
Measure each side of the frame and cut the foam strip to length with scissors before peeling the backing. Then peel an inch of backing, press the foam firmly along the door stop or window jamb, and slowly peel and press the rest as you go. Don't try to stretch the foam — stretched foam shrinks back and pulls the adhesive off the wood.
Close the door or window slowly and check it still closes properly. If it won't latch, the foam is too thick for that gap and you need a thinner profile. (This is why I keep two rolls — a thicker one and a thinner one — in the supply box.)
Pro Tip
Buy a little more than you measure. Weatherstrip is cheap and running out three feet short on a Sunday is the kind of thing that ends a project for a week.
Step 5
Install a Door Sweep on the Front Door
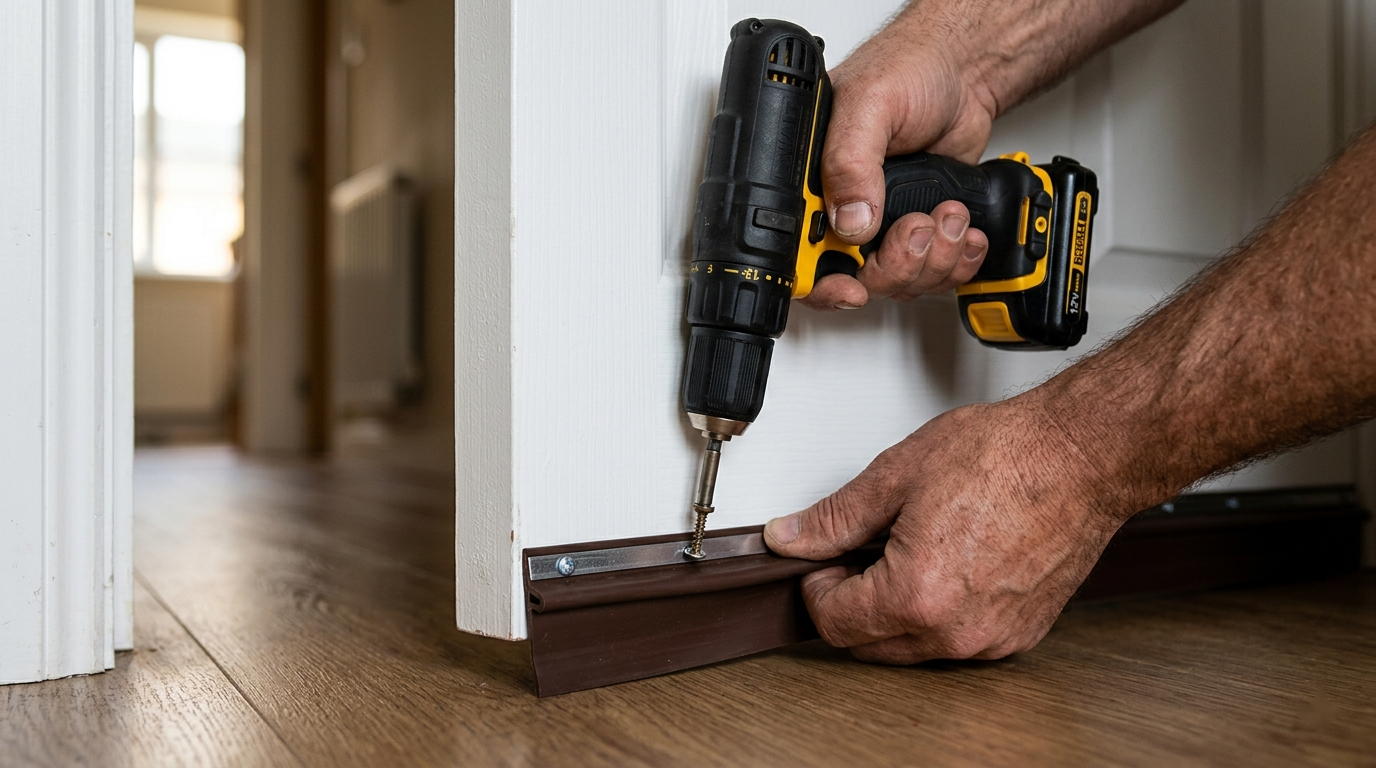
If you do nothing else on this list, do this one. The gap under your front (or back) door is almost certainly the single biggest air leak in the whole house. Five minutes and one part fixes it.
Open the door and measure across the bottom. Buy a door sweep that matches that width — they're usually adjustable by an inch or two. With the door open, hold the sweep against the bottom edge so the rubber or bristles just kiss the floor when the door is closed. Mark the screw holes with a pencil, drill small pilot holes, and screw it on. Test by closing the door and looking for daylight underneath. There shouldn't be any.
Some sweeps are adhesive instead of screws — fine for interior doors leading to garages or unconditioned rooms, but the screwed-on type holds up better on a front door that gets opened twenty times a day.
Step 6
Test Your Work
Wait for the next windy day and run the incense stick around every spot you sealed. The smoke should hang straight down. Where it doesn't, the strip's too thin, the surface wasn't clean enough, or there's a second leak you missed. None of these are hard to fix once you know about them.
What This Actually Saves
The Department of Energy's standard estimate is that air leaks account for 25–40% of a home's heating and cooling energy. Most of that doesn't come from any one giant hole — it comes from a dozen small ones, every one of which is fixable in ten minutes for under five dollars.
Weatherstripping pairs especially well with the rest of this season's energy work. The smart thermostat stops you cooling an empty house, the pre-summer AC tune-up makes sure the system is actually efficient when it does run, and the DIY energy audit finds the rest of the leaks the incense stick missed. The thermostat is the brain; weatherstripping is the envelope. Both matter.
Spend a Saturday afternoon on this now, and by August you'll notice it on the bill — and, more memorably, in how much quieter and steadier the house feels in the heat.