The first ninety-degree day always sneaks up on me. I'll flip the thermostat to cool for the first time, hear that familiar click and hum, and then spend the next ten minutes wondering why the house isn't getting any cooler. Last summer, that little ritual ended with a $480 service call and a technician shaking his head at how much dryer lint had piled up against my outdoor unit.
Here's the thing — most of what an HVAC pro does on a basic spring tune-up is stuff you can absolutely do yourself in a Saturday morning. None of it requires special tools, none of it voids your warranty, and most of it makes a noticeable difference in how well your system runs. If you take an hour now, before the heat hits, you're way less likely to be the person sweating through a service queue in July when every HVAC company in town is booked two weeks out.
Here are the seven things I run through every spring before I let the AC turn on for the season.
Before You Start
Cut power to the system at the breaker before doing any cleaning around the indoor or outdoor unit. There's also a service disconnect box mounted on the wall next to most outdoor condensers — flip that off too. Capacitors hold a charge even after power is cut, so don't open up the electrical panel of the condenser. Everything in this guide stays well clear of the electrical components.
Step 1
Replace the Air Filter
Start with the easiest, highest-leverage thing on the list. A clogged filter forces the blower to work harder, restricts airflow across the evaporator coil, and can actually cause the coil to freeze up on a hot day. I've seen filters at the end of winter that looked more like gray felt than a filter.
Pop in a fresh pleated filter — MERV 8 to 11 is the sweet spot for most homes. Higher MERV ratings sound better on paper, but they restrict airflow more, and not every system is designed for them. If you have pets or allergies, lean toward MERV 11. If neither, MERV 8 is fine.
Write the install date on the edge of the filter with a Sharpie so you actually know when to swap it next. For a deeper dive on filter sizing, MERV ratings, and how often you really need to change yours, see our full guide on how to change your HVAC filter.
Step 2
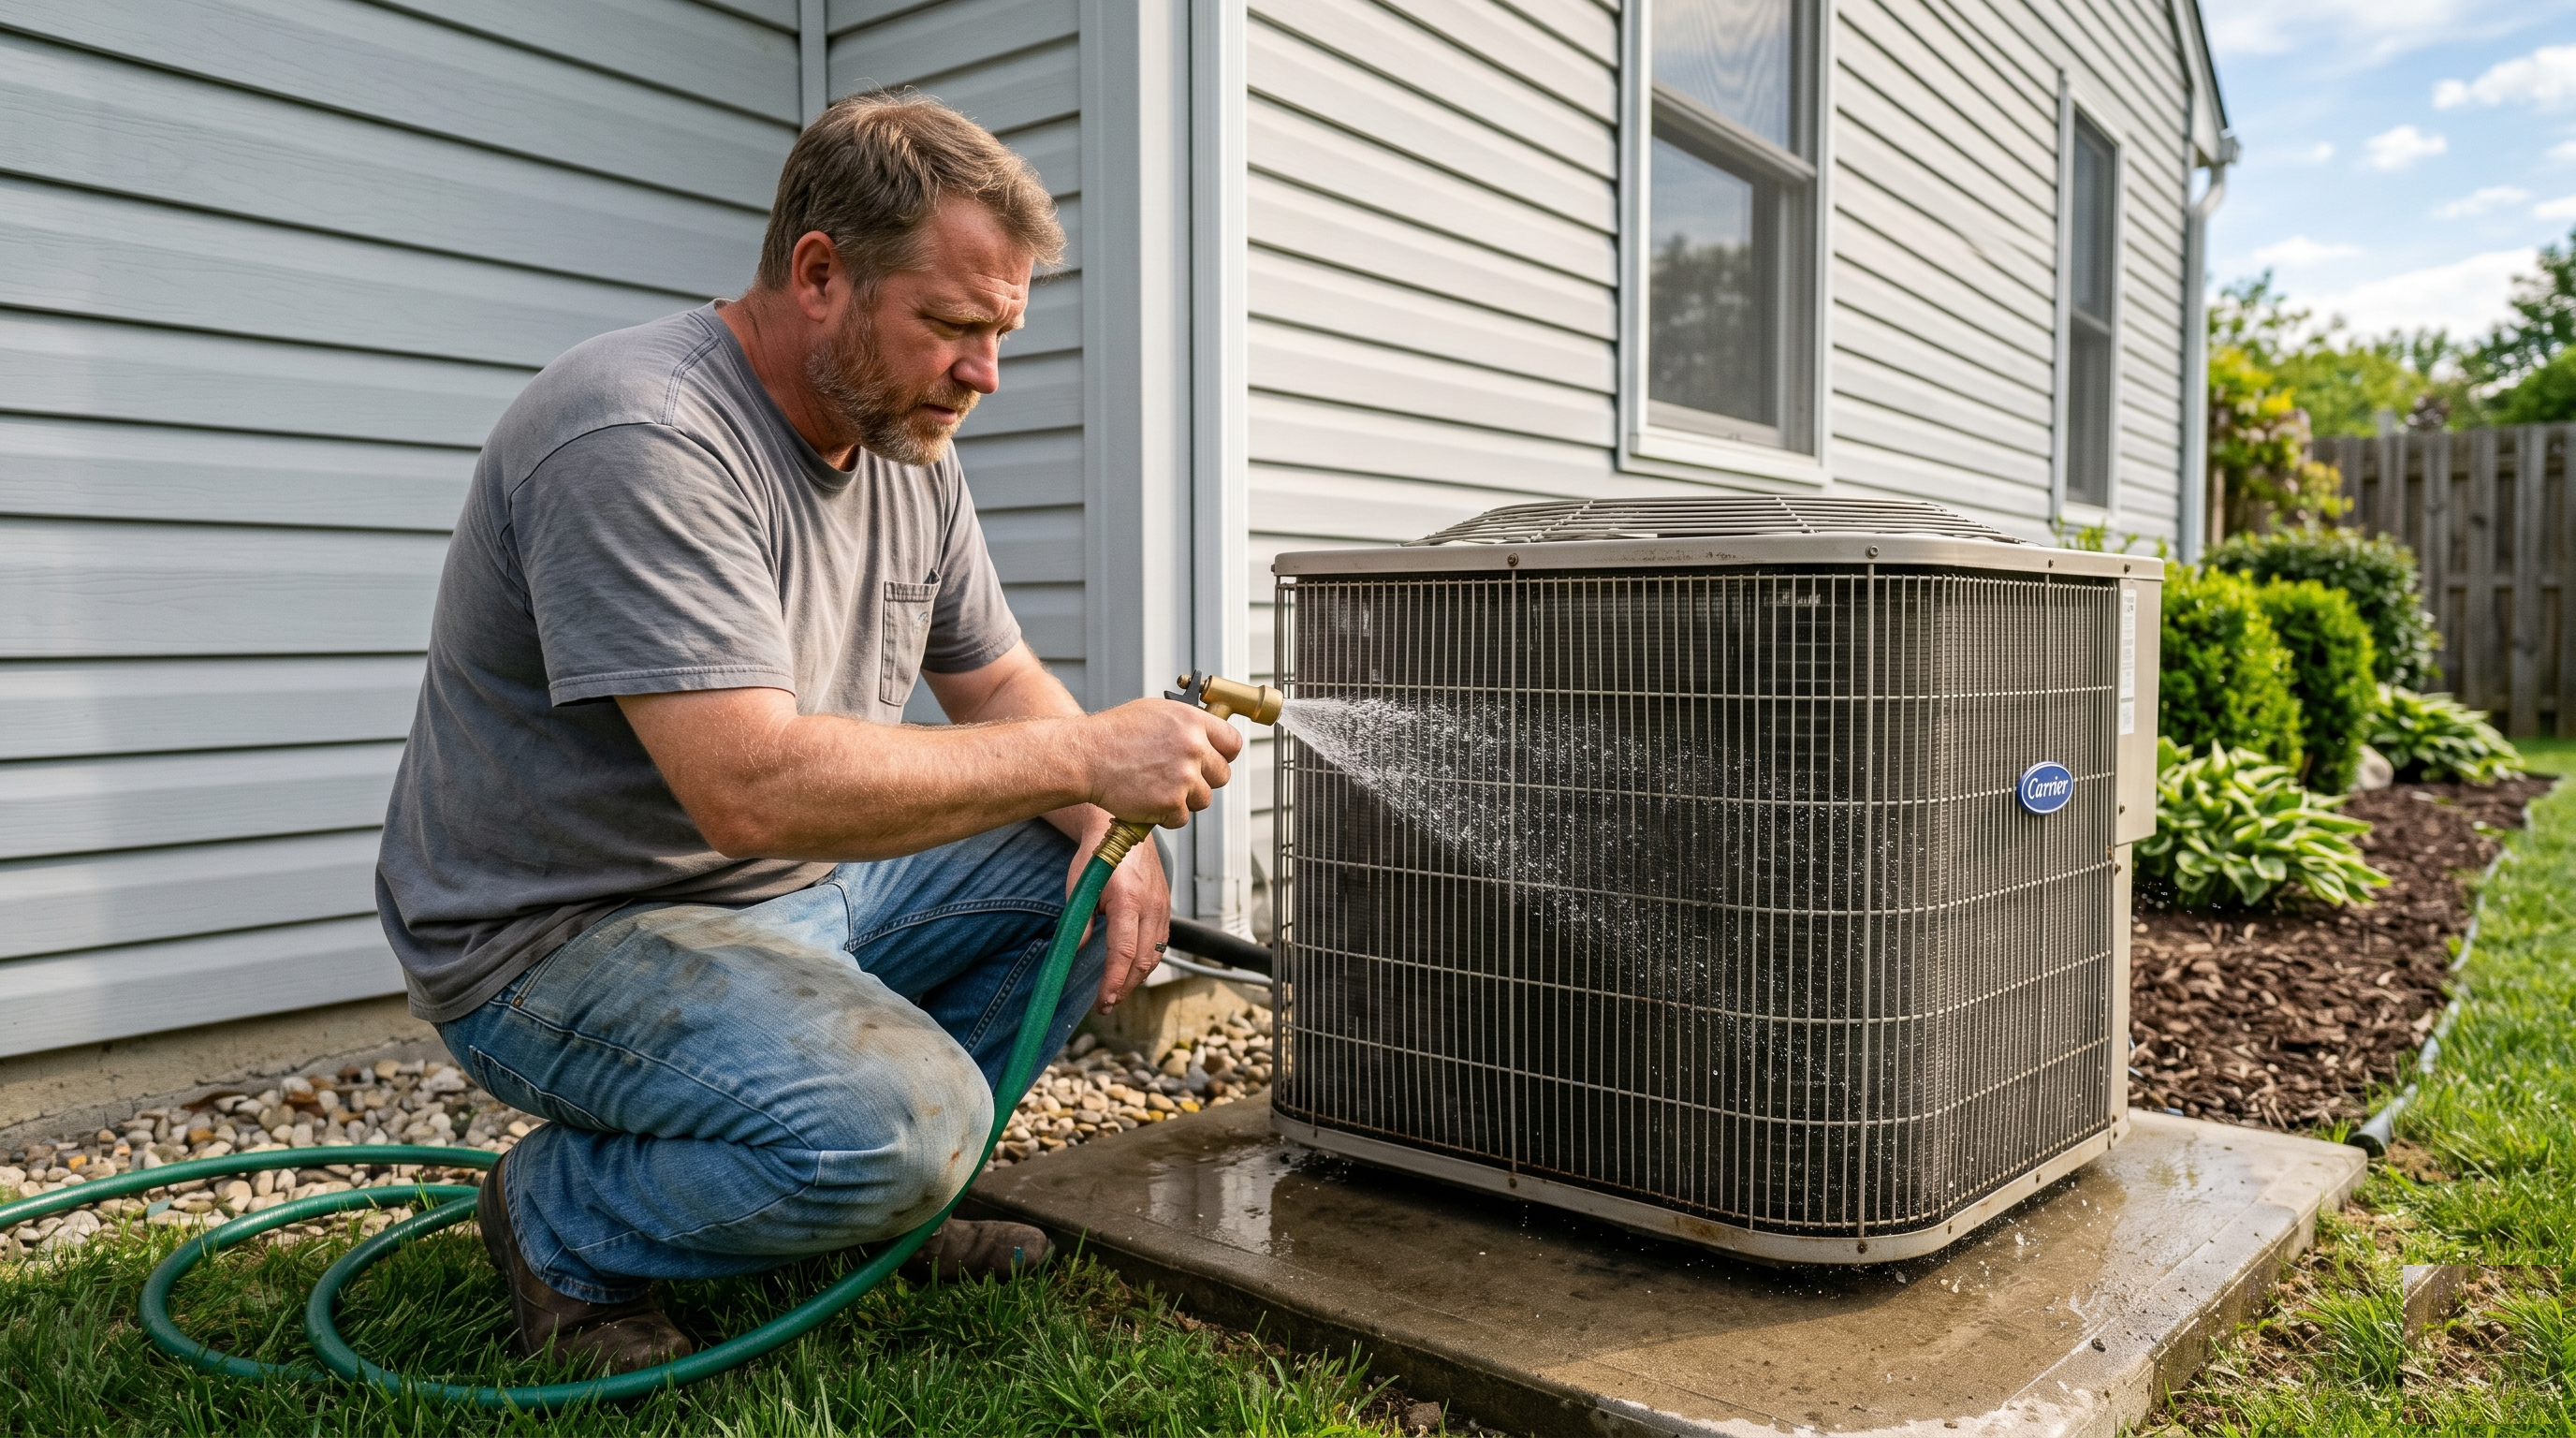
Clear the Outdoor Condenser
Your outdoor unit — the big metal box with the fan on top — is essentially a giant heat exchanger. It dumps the heat from your house into the outside air. To do that, it needs to breathe. After a winter of leaves, dryer lint, grass clippings, and the occasional plastic bag, mine usually has about an inch of debris packed against the fins.
Trim back any plants, shrubs, or grass within two feet of the unit. The general rule is two feet of clear space on every side and at least five feet of clearance overhead. Pull out any sticks or leaves that have collected in the base.
Then take a regular garden hose — not a pressure washer, that'll bend the fins — and rinse the coil from the inside out if you can get the top grille off, or from the outside in if you can't. Spray gently and let the water push the gunk back the way it came in. Top to bottom is fine. You'll be surprised how dirty the runoff is.
Pro Tip
If the fins are bent in spots — common from string trimmers or hailstorms — a $10 fin comb straightens them in about ten minutes. Bent fins choke airflow just like dirt does.
Step 3
Flush the Condensate Drain Line
This is the one almost nobody knows about, and it's the one that causes the biggest headaches. Your AC pulls humidity out of the air as it cools, and that water has to drain somewhere — usually through a small white PVC pipe that runs from the indoor air handler to a floor drain or outside the house.
Over the off-season, that line grows algae and slime. When it clogs, the water backs up. Sometimes a safety switch shuts the system off (best case), and sometimes the overflow pan overflows and dumps water into your ceiling or onto the floor (the case I learned the hard way).
Find the access port — it's a little T-shaped or capped fitting near the air handler, often with a removable plug. Pull the cap off and pour a cup of distilled white vinegar down it. Let it sit for half an hour, then run a gallon of warm water through to flush. Some people use bleach instead, but bleach can degrade the PVC glue over time. Vinegar's gentler and it works.
Then go outside or wherever the line exits the house and confirm water is actually coming out the other end. If nothing's coming out, you've got a clog farther down the line and you'll need to shop-vac it from the exit point.
Step 4
Test the Thermostat
Before the first hot day catches you off guard, run the system for ten minutes with cooling mode active and verify three things: it actually kicks on, the air coming out of the supply vents is noticeably cold (a 15-20°F drop from the return temperature is normal), and the thermostat reads close to your house's actual temperature.
If you have a battery-powered thermostat, swap the batteries. They almost always last longer than a year, but a dying thermostat battery in July is a bad time to find out you forgot.
If you have a smart thermostat — Nest, Ecobee, or similar — most of them have a built-in HVAC report you can check in the app. They'll tell you if anything looked weird during the heating season. It's worth a glance.
Step 5
Check the Refrigerant Lines
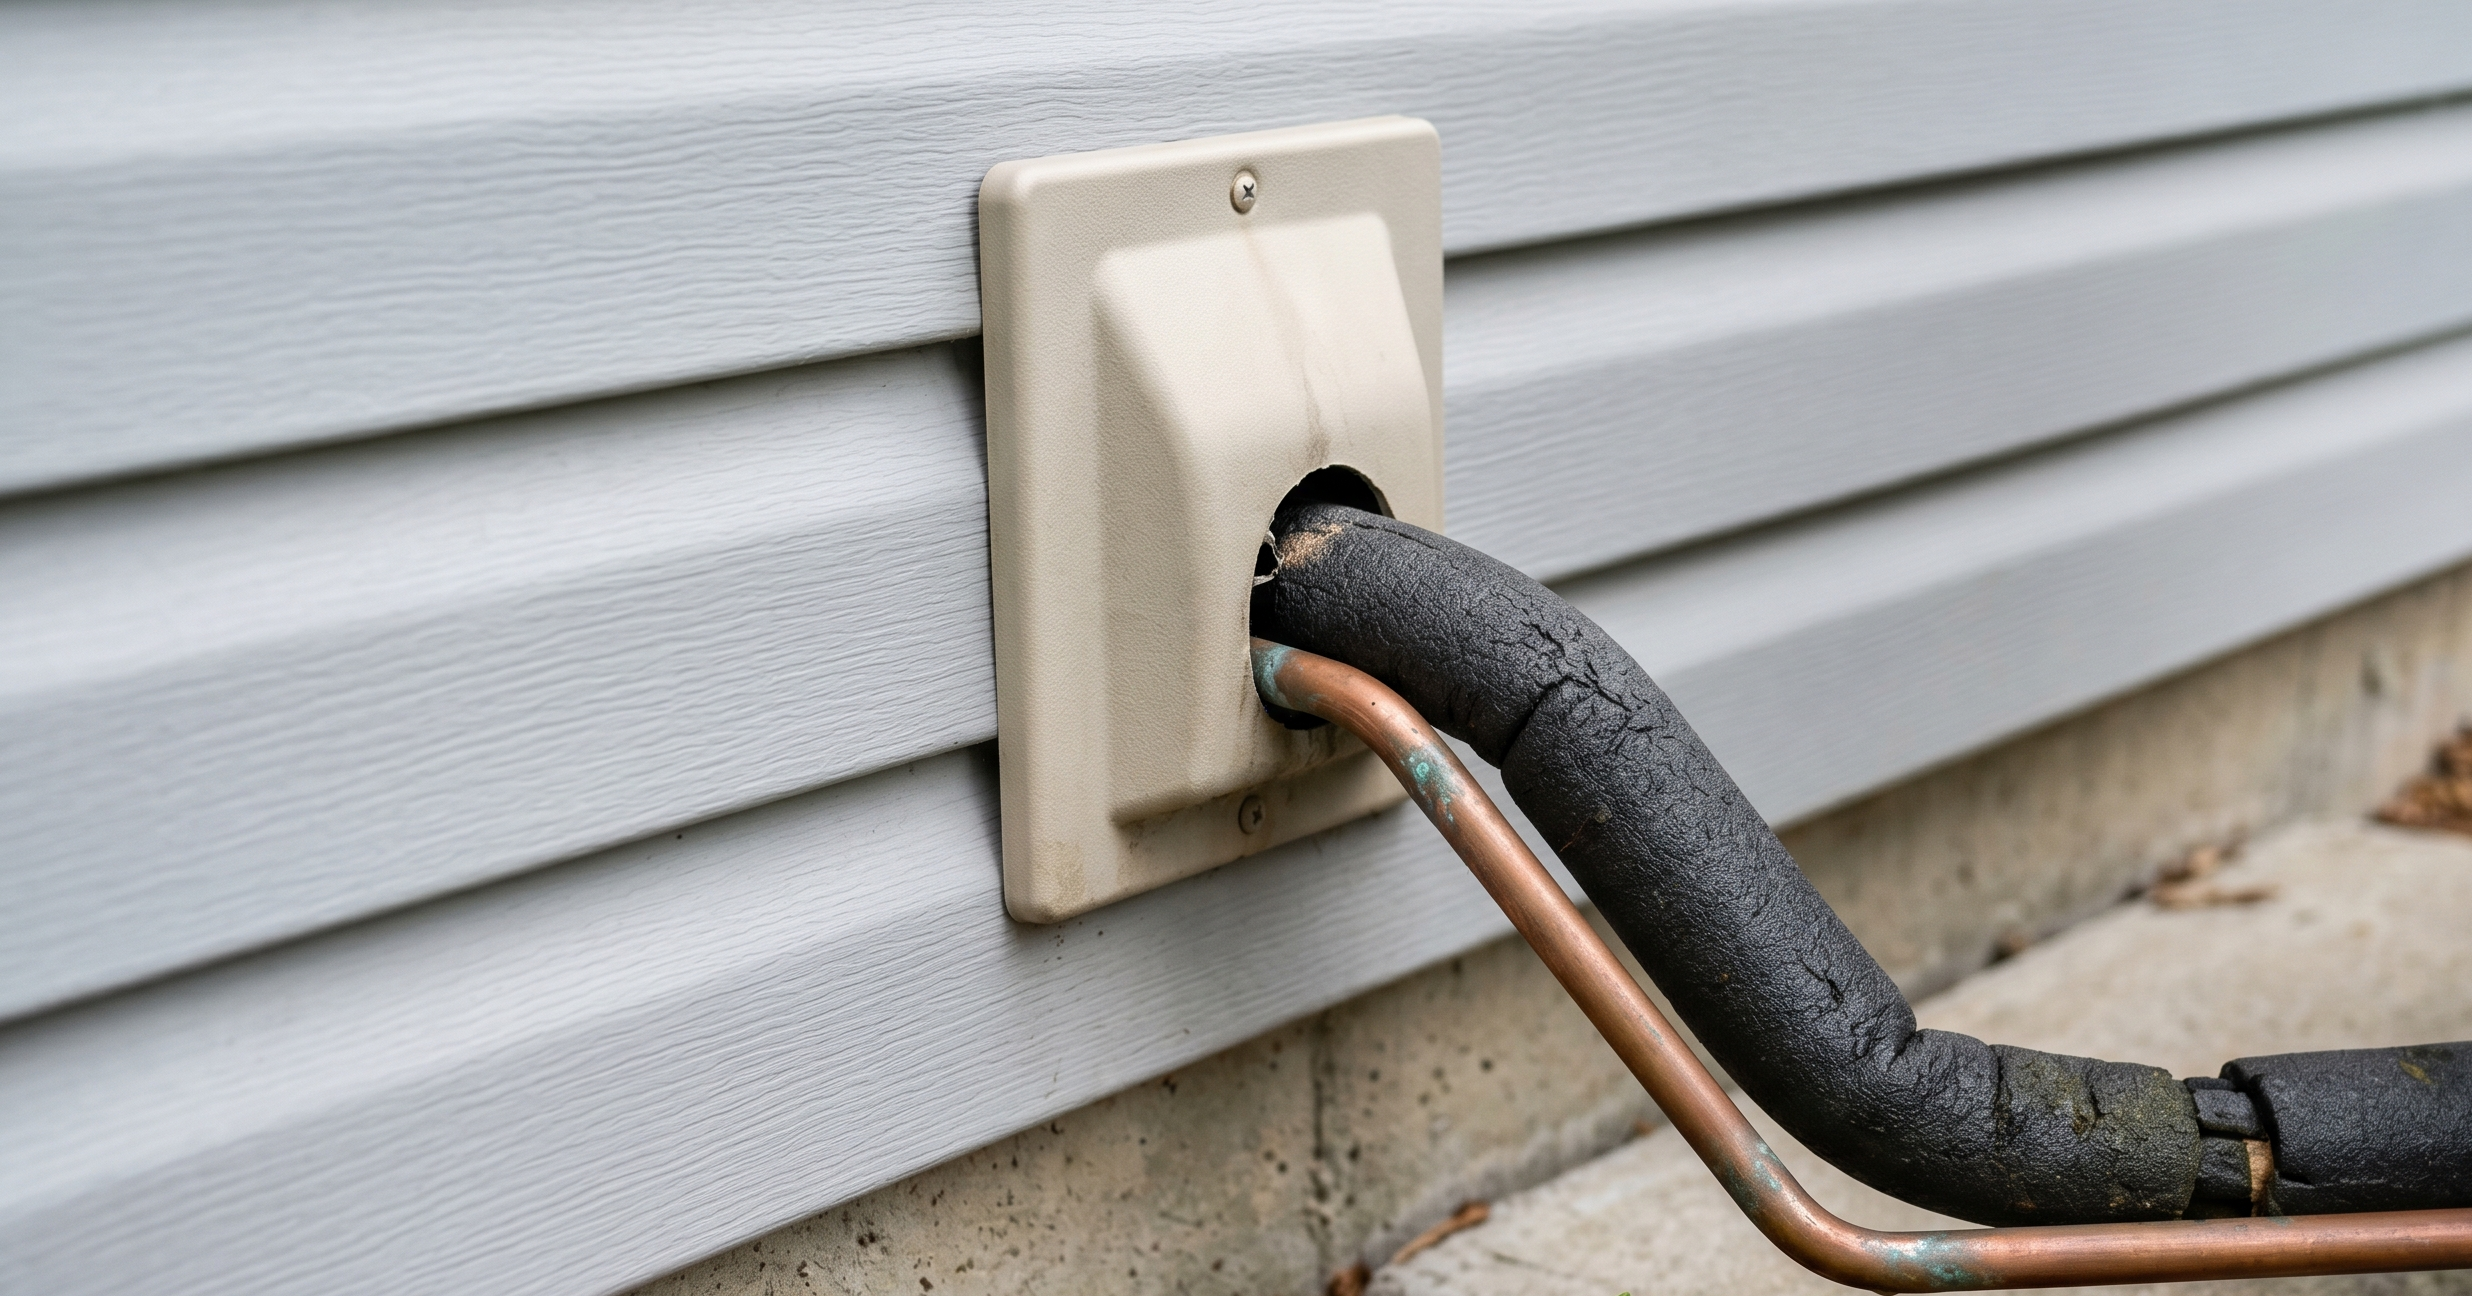
Two copper lines run between your indoor and outdoor units. The smaller one is bare copper. The larger one — the suction line — is wrapped in black foam insulation. That insulation matters. If it's torn, missing, or sun-rotted, your system loses efficiency and the compressor has to work harder.
Walk the line from where it exits the house to where it meets the condenser. Any gaps in the insulation can be patched with a foam pipe sleeve from the hardware store for under $10. Slit it lengthwise, wrap it around the line, and tape it closed.
While you're there, look for any oily residue on the lines or around the connections. Refrigerant leaks are oily because the refrigerant carries lubricating oil with it. Oily spots almost always mean a leak, and that's a job for a licensed HVAC tech — not because it's hard, but because handling refrigerant requires EPA certification.
Also: if you turn the system on and see frost or ice forming on the larger copper line, shut it off immediately. Frost on the line means the system is operating at too low a pressure, usually from low refrigerant or restricted airflow, and running it that way will damage the compressor.
Step 6
Clean What You Can Reach on the Indoor Coil
The indoor portion of your AC — the air handler, usually in a closet, basement, or attic — gets dusty. The evaporator coil sits inside this unit, and any dust that gets past the filter ends up coating the coil. Caked-on dust insulates the coil, which means worse heat transfer, which means weaker cooling and higher bills.
Here's the honest truth about DIY coil cleaning: there's a clear line between what a homeowner should do and what's pro territory. Three tiers:
1. Light dust (DIY). If the access panel comes off with a few screws and you can see the coil, vacuum out the loose dust around the blower wheel and the visible coil face with a shop vac and a soft brush attachment. Don't scrub the coil itself — the aluminum fins bend easily and bent fins choke airflow worse than dust does. Just remove what's loose.
2. Mild buildup (DIY). If there's a thin film coating the coil but you can still see the metal, pick up a can of no-rinse evaporator coil cleaner at any home improvement store (Nu-Calgon Evap Pow'r and AC-Safe foam are common). Spray, let it foam, and the condensate will rinse it down the drain once the system runs. Follow the can directions exactly.
3. Caked, moldy, or sealed shut (pro). If the coil is so dirty you can't see metal, has visible mold or biological growth, or sits in a factory-sealed cased cabinet (common on newer high-efficiency systems — sealed with foil tape and mastic), stop. A real cleaning at that point usually means pulling the coil out, applying stronger acid or alkaline cleaners, and re-sealing the cabinet. That's a $200-400 service call and worth every penny — botching it can leak refrigerant, damage the coil, or hurt your warranty.
Bottom line: vacuum and foam-clean if you can reach the coil and it looks reasonable. If anything feels off, leave it for the tech.
Pro Tip
Take a phone photo before you remove the access panel and before you vacuum anything. If you accidentally bump a wire or knock something loose, the photo tells you exactly how it's supposed to look. I've saved myself twice with this trick on bigger HVAC jobs.
Step 7
Run a Full Cooling Cycle and Listen
Once everything is back together and power is restored at the breaker and the disconnect, drop the thermostat about five degrees below the current room temperature and let the system run for a solid 15-20 minutes. Walk around and pay attention.
What you want: a steady hum from the outdoor fan, cold air at the supply vents, no water around the air handler, and the system reaching the set temperature within a reasonable time.
What you don't want:
- Grinding, screeching, or rattling from the outdoor unit — usually a failing fan motor or a loose part
- Hissing or bubbling from the refrigerant lines — possible leak
- A musty or sour smell from the vents — biological growth somewhere in the system
- Air that feels lukewarm even after 20 minutes — likely low refrigerant or a dirty coil
- The outdoor fan running but no air movement through the indoor vents — blower problem
If anything on that list shows up, that's when you call an HVAC tech. The whole point of this checklist is to find problems now, when the schedule is open and you have time to deal with it, rather than at 4 PM on the hottest Saturday of July.
When to Skip the DIY and Call a Pro
Even with a perfect tune-up routine, an AC system should get a professional inspection roughly every other year. A licensed tech can check refrigerant pressures, electrical components, and capacitor health — things that aren't safe to DIY. If your system is more than ten years old or has been showing weak performance, schedule a pro service before the heat sets in.
Beyond that, anything involving refrigerant, electrical components inside the condenser, or compressor problems is hands-off. The guide above is everything a homeowner can safely tackle. The rest is what techs are for.
The Payoff
Here's the math: an annual AC tune-up at most service companies runs $100-$200. Doing the seven items above yourself costs maybe $25 in supplies (filter, vinegar, foam insulation if needed) and an hour of your time. You'll get a system that runs more efficiently — usually 5-15% less energy use — runs quieter, and is less likely to fail when you need it most.
And if you want to keep the savings rolling, our DIY home energy audit walks through the rest of the house with the same mindset. Pair this with the broader summer home maintenance checklist and you'll have your house ready for whatever July throws at it.
Set a reminder for early next May and run through this list again. Future you, sitting in a cool house while your neighbor waits four days for a service tech, will thank you.