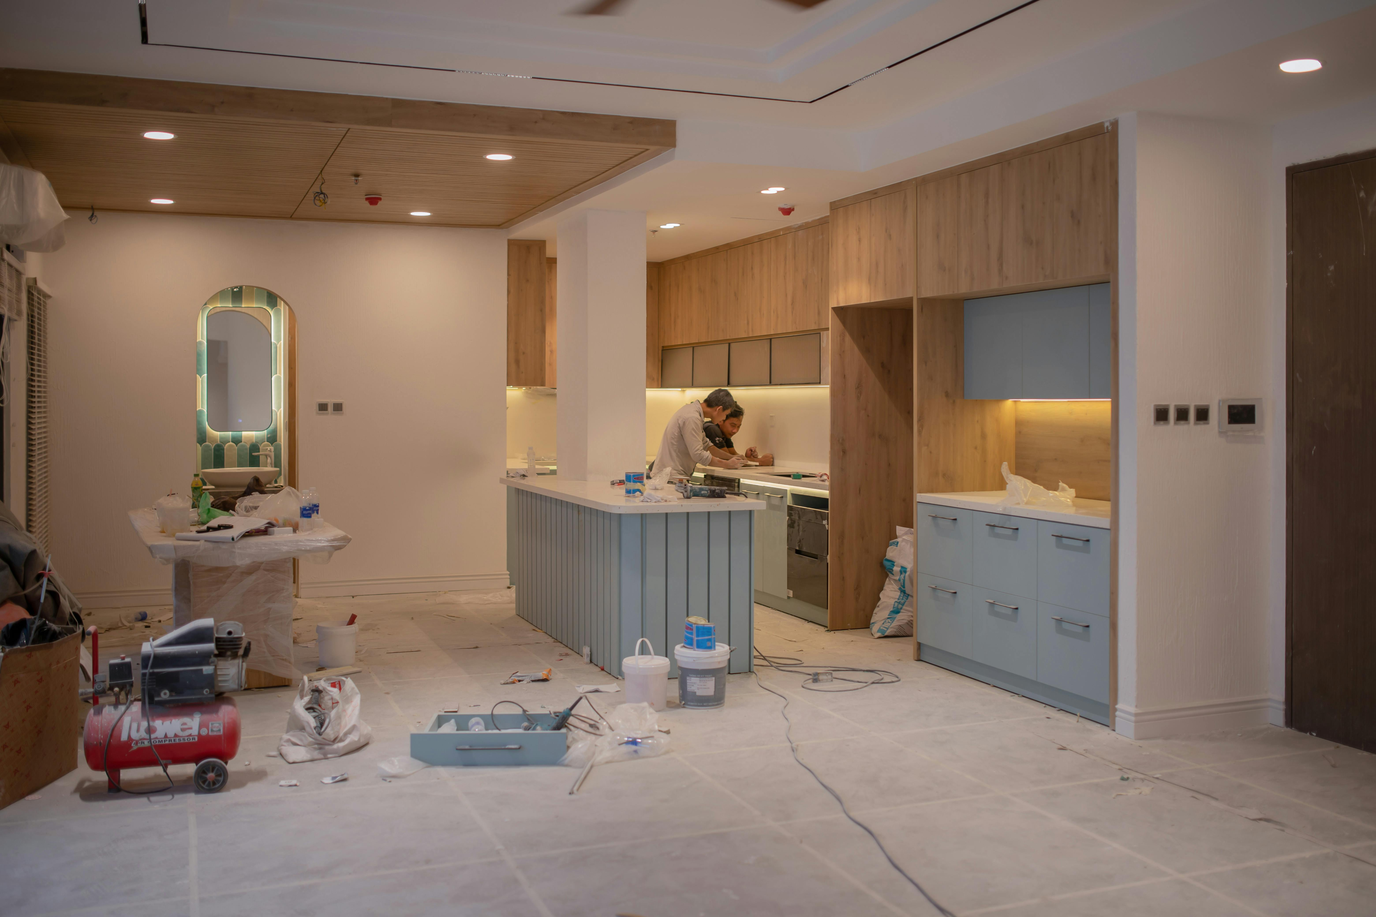
My kitchen always seemed to age in dog years. One day the cabinets looked fine, the next I was opening drawers with sticky brown pulls that came with the house in 2014. A real renovation was firmly out of the budget — ours was earmarked for a roof that year — but standing in there every morning making coffee was getting genuinely depressing. The conclusion I landed on, two weekends and about $175 later, is the one I'm passing along: a kitchen doesn't need a renovation to feel brand new. It needs three specific changes.
Paint the cabinets, swap the hardware, and put up a peel-and-stick backsplash. That's the whole list. Together these three moves give you maybe 80% of the visual impact of a full reno for about 1% of the price, and you can have them done by Sunday night. The order matters and the prep matters, which is what the rest of this is about.
Renters and the Cautious
All three moves here are renter-and-resale-friendly. Paint is paint (you can repaint white if needed), hardware uses the same screw holes the old ones came out of, and peel-and-stick backsplash comes off cleanly with a heat gun if you ever decide to remove it. Nothing here is irreversible — which is exactly what makes it a low-risk weekend.
Move 1
Paint the Cabinets (Yes, Really)
This is by far the biggest visual change you can make for the smallest amount of money. A gallon of good cabinet paint runs $55 to $80, and that's enough for a typical kitchen with a coat or two left over for touch-ups in a year.
The mistake almost everyone makes is skipping prep. Sticky old cabinets covered in years of cooking-grease film will reject paint like Teflon. The real work here — 80% of how the final result looks — is the cleaning and sanding before the first drop of paint goes on. Take the doors off, take the hardware off, wipe everything down with a degreaser (TSP or a TSP substitute works great), then scuff every surface with 220-grit sandpaper. You're not trying to remove the finish, just give the primer something to grab.
Prime once, paint twice. Use a small foam roller for the flat panels and a quality angled brush for the edges and grooves. Let each coat dry overnight — cabinet paint that hasn't fully cured between coats is what produces that tacky, fingerprint-attracting finish people complain about. If you're working through the full painting guide, the same principles apply: thin coats, patience, and don't rush the dry time.
Move 2
Swap the Hardware
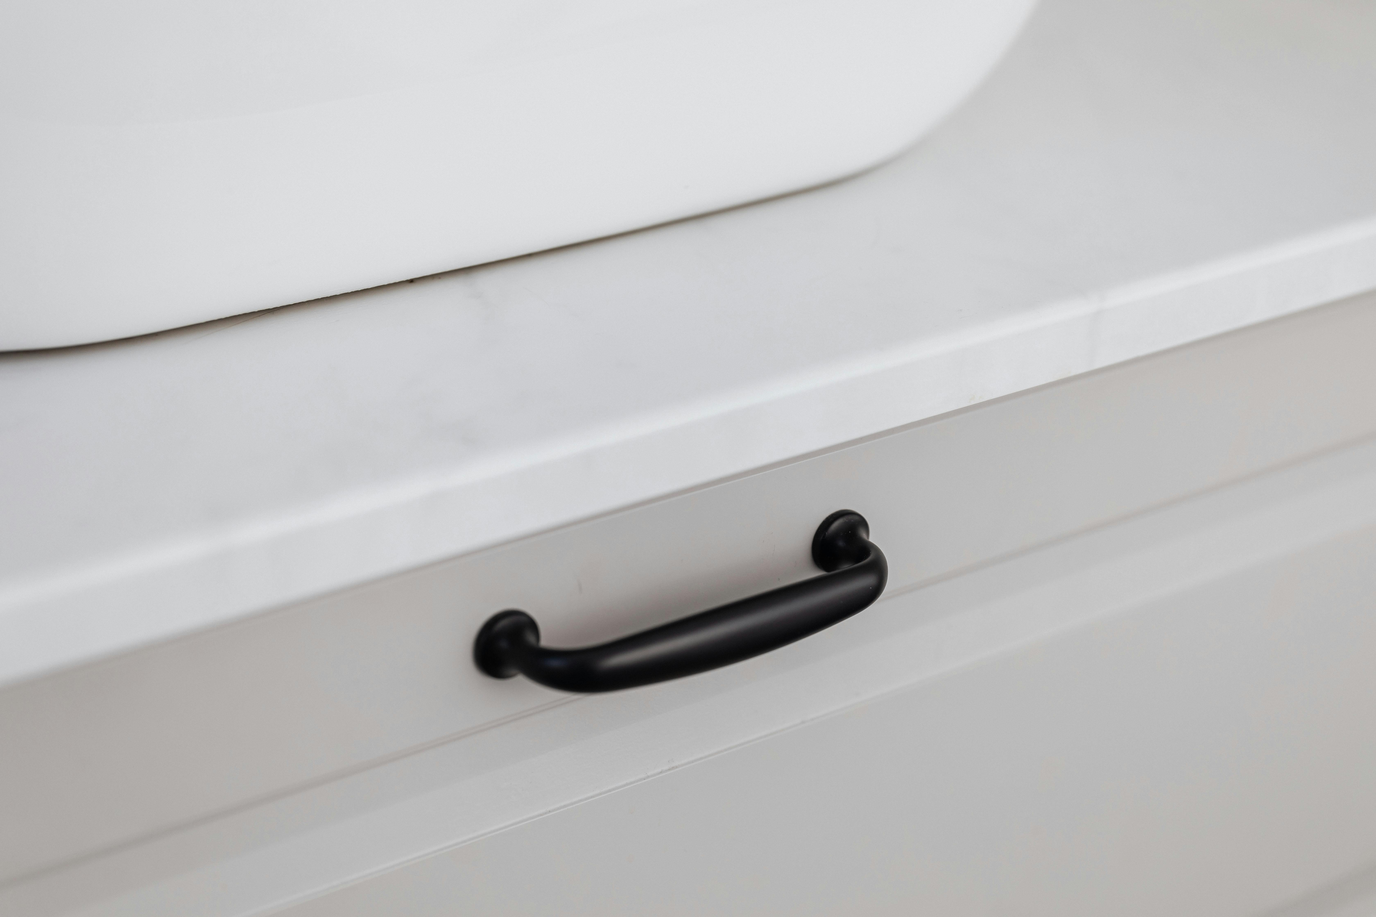
If painting is the biggest impact, hardware is the most efficient one. Five bucks per pull or knob, ten minutes per cabinet, and the whole kitchen feels like it belongs to this decade. Brushed brass is having a long moment and pairs well with painted cabinets in almost any color, but black, satin nickel, or oil-rubbed bronze all work if brass isn't your thing.
Two practical notes before you buy a single pull. First: measure your existing hole spacing (center to center on the screws). Standard sizes are 3 inches and 3.75 inches — a pull that's even a quarter inch off won't fit and you'll be drilling new holes. Second: count what you actually need. The drawers, all the lower cabinet doors, all the upper cabinet doors, the pantry. It's a lot more than you'd guess. I bought 12 pulls thinking that was generous, then discovered I needed 22. Count twice, order once.
Installation is genuinely just unscrewing the old pull and screwing the new one through the same hole. Five minutes per cabinet, including the wow moment when you step back.
Move 3
Put Up a Peel-and-Stick Backsplash
This is the move that turns a refreshed kitchen into one that actually looks designed. Real tile is a several-hundred-dollar weekend job involving thinset, grout, and a wet saw — worth doing if you'll live there ten more years, hard to justify otherwise. A good peel-and-stick subway tile sheet runs about $10 to $15, and ten or twelve sheets handle a normal kitchen for under $150.
The trick to peel-and-stick that doesn't look like peel-and-stick is the wall prep and the cutting. Wipe the wall clean and let it dry completely — any grease or moisture and the corners start lifting in a month. Cut every sheet with a sharp utility knife against a straightedge; scissors leave a wavy edge that screams "DIY" the second you look closely. Press from the center outward to avoid air bubbles. Finish with a $4 plastic squeegee or even an old credit card.
Around the edges — against the countertop, around outlets, into corners — measure twice and cut slightly long; you can always trim more, you can't add back. A bead of fresh white caulk along the seam where the backsplash meets the countertop hides any small gaps and seals out water.
The Optional Bonus: Lighting
If you have a spare hour and another $25, this is the cheapest jump in luxury-feel of any of them. A strip of stick-on under-cabinet LED lighting tucked under the upper cabinets transforms how the counter and your new backsplash actually look at night. Most kits are plug-in (no electrical work) and adhesive-backed (no screws). Truly five minutes per cabinet. The reaction the first time you flip them on is consistent: "Wait, this is the same kitchen?"
The Weekend Timeline
Because the paint needs serious dry time between coats, the order this happens in is what determines whether you actually finish by Sunday night or end up with a half-painted kitchen on Monday morning. Here's the realistic schedule:
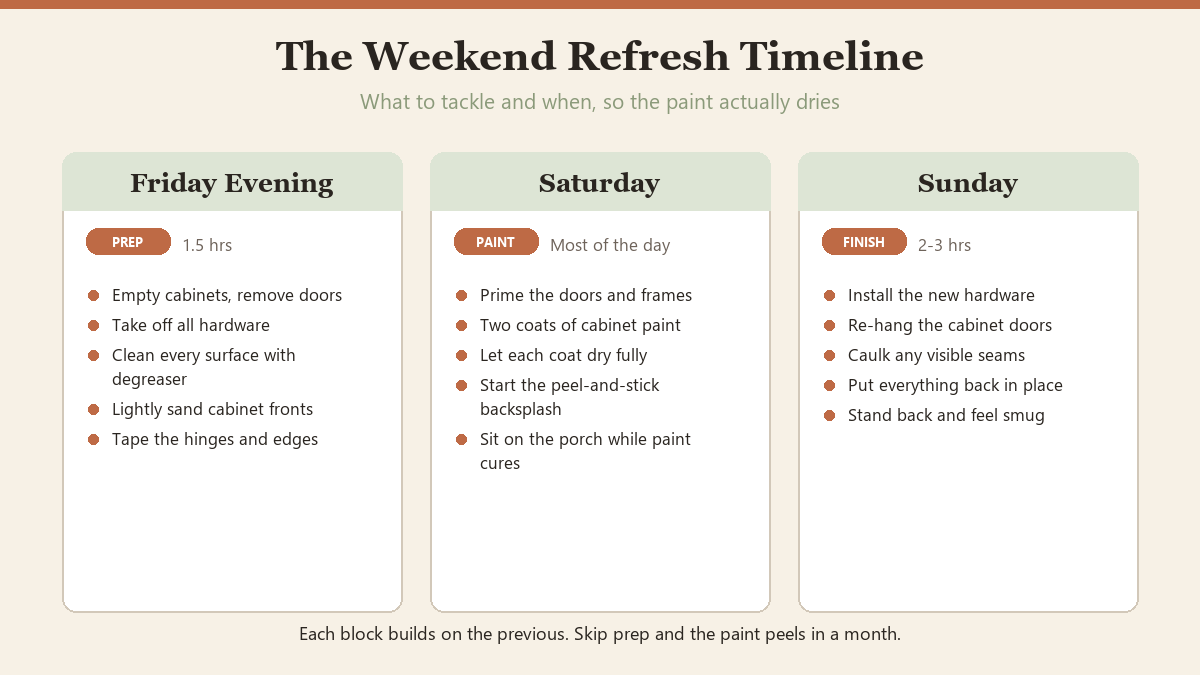
Friday evening is non-negotiable. If you start your prep at 9 a.m. Saturday, the first coat of paint goes on around lunch, the second coat won't be on until evening, and the doors won't be dry enough to re-hang Sunday morning. Eating the prep on Friday is what makes the whole weekend work.
Pro Tip
Label every door and its hinges with painter's tape and a Sharpie before you take it off ("upper-left-1" etc., with corresponding labels in the cabinet box). Re-hanging is then a five-minute paint-by-numbers job. Mismatched hinge holes from "close enough" guessing is the single most common Sunday-night kitchen-refresh disaster.
The Budget, Itemized
- Cabinet paint + primer + brushes + roller — about $95
- 20 cabinet pulls at $5 each — about $100
- 10 sheets peel-and-stick subway tile — about $120
- Caulk, painter's tape, drop cloth, sandpaper — about $25
- Optional under-cabinet LED strip — about $25
- Total: roughly $340 fully loaded, or about $200 if you skip the LEDs and already own basic homeowner tools.
Compare that to a quoted cabinet replacement (typically $8,000 to $20,000 even for a small kitchen) or a tile-and-grout backsplash install ($500 to $1,200 with labor), and the math gets very persuasive very fast.
The Honest Caveat
This is a refresh, not a renovation. It will not fix bad layout, broken cabinet boxes, water damage, or a 30-year-old appliance suite. If your cabinets are coming apart at the joints, no amount of paint will save them and you're better off saving for new ones. If the issue is the kitchen's bones, this is lipstick. But if the bones are fine and the surfaces just look tired — which is most of the time — you can fix the actual problem this weekend.
Once the kitchen's done, the same playbook (paint + hardware + a small surface change) works on a tired bathroom or laundry room too. Worth keeping in mind for the next free weekend.