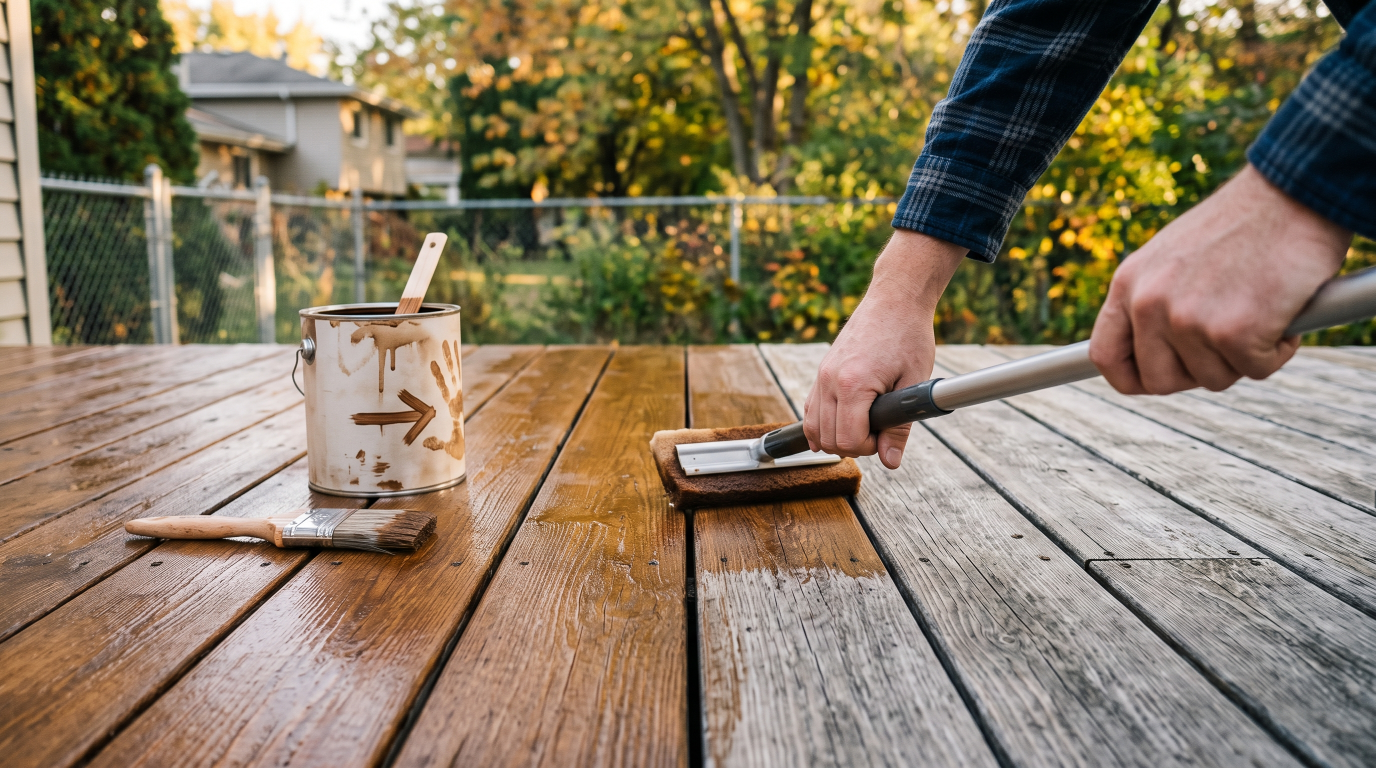
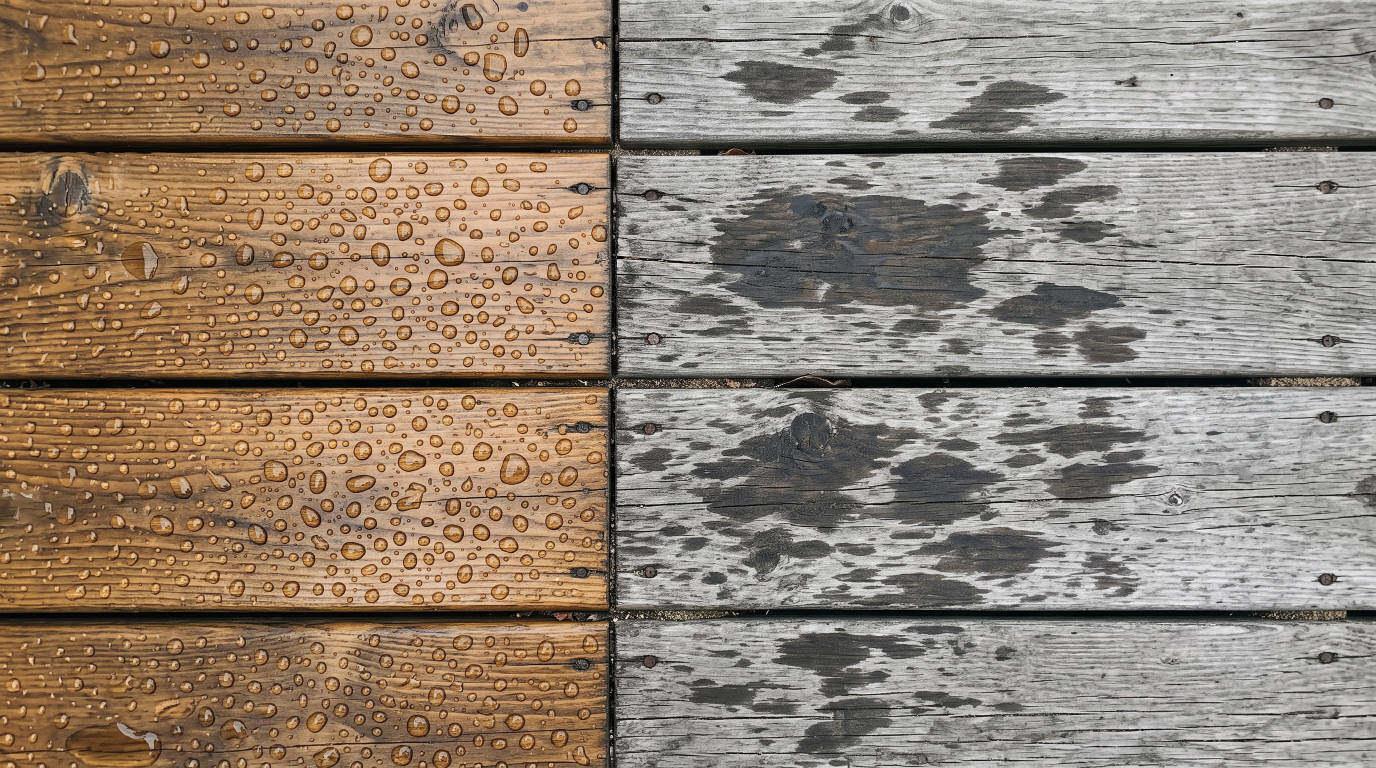
Back in July, the monthly checklist had you walk the deck barefoot and sprinkle some water on the boards. If the water soaked straight in instead of beading up, the instruction was: note it for a staining weekend in September, because July heat cooks stain before it can cure. Well — it's September, the nights are cool, and this is that weekend. Two of them, actually, and the second one is the easy one.
Here's the thing about deck stain that the can never quite says out loud: the staining is the fast part. A 300-square-foot deck takes maybe three hours of actual stain-spreading. What separates a finish that lasts three years from one that's peeling by April is everything that happens before the lid comes off — the washing, the drying, and the willingness to check the forecast twice. That's why this is a two-weekend plan and not a Saturday impulse.
First, pick your finish — it decides everything else
"Stain and seal" gets used like they're two products, but on a modern deck they're almost always one can: every exterior deck stain worth buying is also a water repellent. The real choice is how much pigment you want, because pigment is sunscreen for wood — more pigment means more UV protection and a longer life, at the cost of hiding more grain. There are four honest options:
If your deck already has a finish on it, the decision is partly made for you: you can always go more opaque over less, but never the reverse without stripping. And a quick word on oil versus water-based: modern water-based stains have largely caught up, they clean up with soap, and they're what many states' VOC rules push you toward anyway. Oil still penetrates dense or older wood a little better and dries slower — which is a feature, not a bug, when you're learning to keep a wet edge. Either is fine; matching what's already on the deck matters more.
How much to buy
A gallon covers roughly 200–300 square feet on a first coat — less on thirsty gray wood, which drinks like it's been stranded at sea. Measure the deck, add the railings (they count, and everyone forgets them), and buy all the cans at once so you can mix them together in a bucket. That trick — boxing — is why the pros never end up with one weirdly darker section.
Step 1
Pick the weather window (this is the whole reason it's September)
Stain has a Goldilocks range: 50 to 85 degrees, out of direct blazing sun, on wood that's genuinely dry. Too hot and the stain flashes off at the surface before it can soak in — that's the July problem, and it's why summer-stained decks peel in sheets. Rain within a day or two of application prints spots into the finish that never leave. September gives you warm afternoons, cool nights, and — the part that matters most — stretches of forecast you can actually trust.
What you're shopping for in the forecast: 24 dry hours before wash day, about 48 dry hours after washing for the wood to dry out, and no rain for 48 hours after staining. That's why the plan is two weekends — wash on the first, stain on the second, and let the week in between do the drying for free. If a surprise storm splits your plan, the deck just gets an extra dry day. The schedule bends; it doesn't break.
Step 2
Fix the boards before you finish them
Stain preserves whatever it lands on, including problems. So the first weekend starts with the repairs you flagged during the July barefoot check: drive the popped nail heads back down (better: replace them with deck screws, which don't pop twice), sink any proud screws, and hit splintered patches with 60–80 grit sandpaper. A board that's cracked through, soft, or springy underfoot gets replaced now — a $15 board and four screws — because it will not improve under a fresh coat of stain.
While you're down there, grab each railing and post and try to wobble it, and snug up any lag bolts that give. A deck you're about to make beautiful should also be a deck nobody leans through at the housewarming for it.
Step 3
Wash it, brighten it, then leave it alone
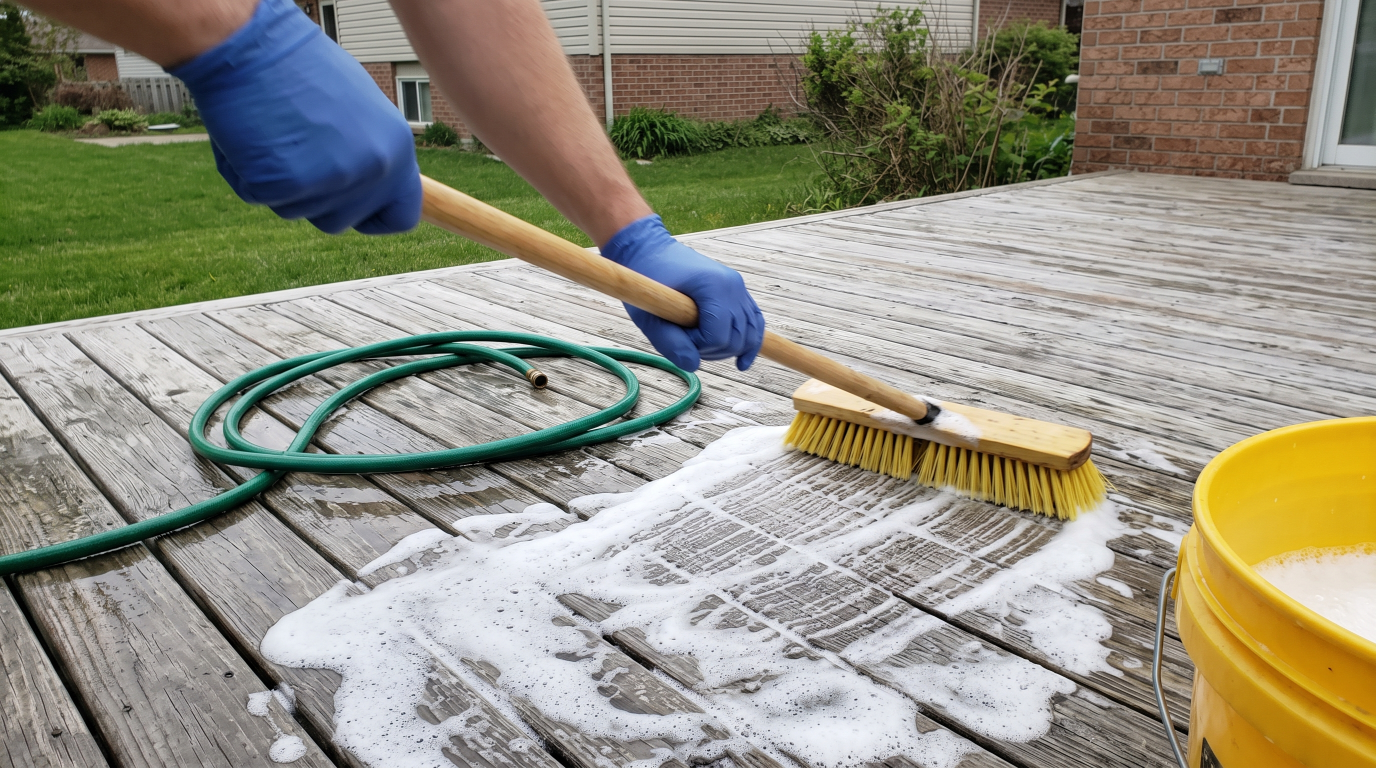
Gray wood isn't dirty wood — it's dead wood cells, cooked by a summer of UV, sitting on top of the good stuff. Stain applied over that gray layer is stain applied to something that's about to flake off. The fix is a sodium percarbonate deck cleaner — the oxygenated kind, not chlorine bleach, which eats the wood along with the stains. Wet the deck, spread the mixed cleaner, keep it wet for ten or fifteen minutes, and scrub with a stiff brush on a broom handle. It's honest work; your back will file a complaint; the wood underneath will look five years younger.
A pressure washer does the same job faster and ruins decks daily. If you use one: 1,200–1,500 psi maximum, the 40-degree fan tip, a foot off the boards, moving with the grain, always in motion. Any closer or hotter and you're carving fuzz into the surface that will have to be sanded off once it dries. When in doubt, the brush can't hurt the deck — the wand can.
After cleaning, cedar and redwood — and any deck that's had a heavy scrub — benefit from a wood brightener: an oxalic-acid rinse that neutralizes the cleaner, knocks out tannin darkening, and takes the pH back to where stain wants it. It's the cheapest step in this whole project and the one most people skip. Rinse everything thoroughly, then walk away for at least 48 hours. The deck must be dry-dry — not looks-dry — before stain. If you want certainty instead of vibes, a moisture meter reading under about 15% is the green light; the free version is taping a square of plastic wrap to a board overnight and checking for condensation in the morning.
Brand-new deck? Wait — but test, don't guess
Fresh pressure-treated lumber is often too saturated to accept stain, and the old "wait a year" rule overshoots badly — wood left bare that long is graying and cracking by month eight. Use the sprinkle test instead: when water stops beading on the new boards and starts soaking in, usually one to three months in, the deck is ready. Kiln-dried lumber can be ready almost immediately.
Step 4
Stain like someone who's done it twice
Second weekend. The forecast held, the boards are dry, and now the fast, satisfying part. Stir the stain (don't shake — bubbles become bubbles in the finish), box your cans together, and plan your exit: railings and verticals first, then deck boards working away from the house toward the stairs. Every season someone stains themselves into a corner, and every season the deck wins.
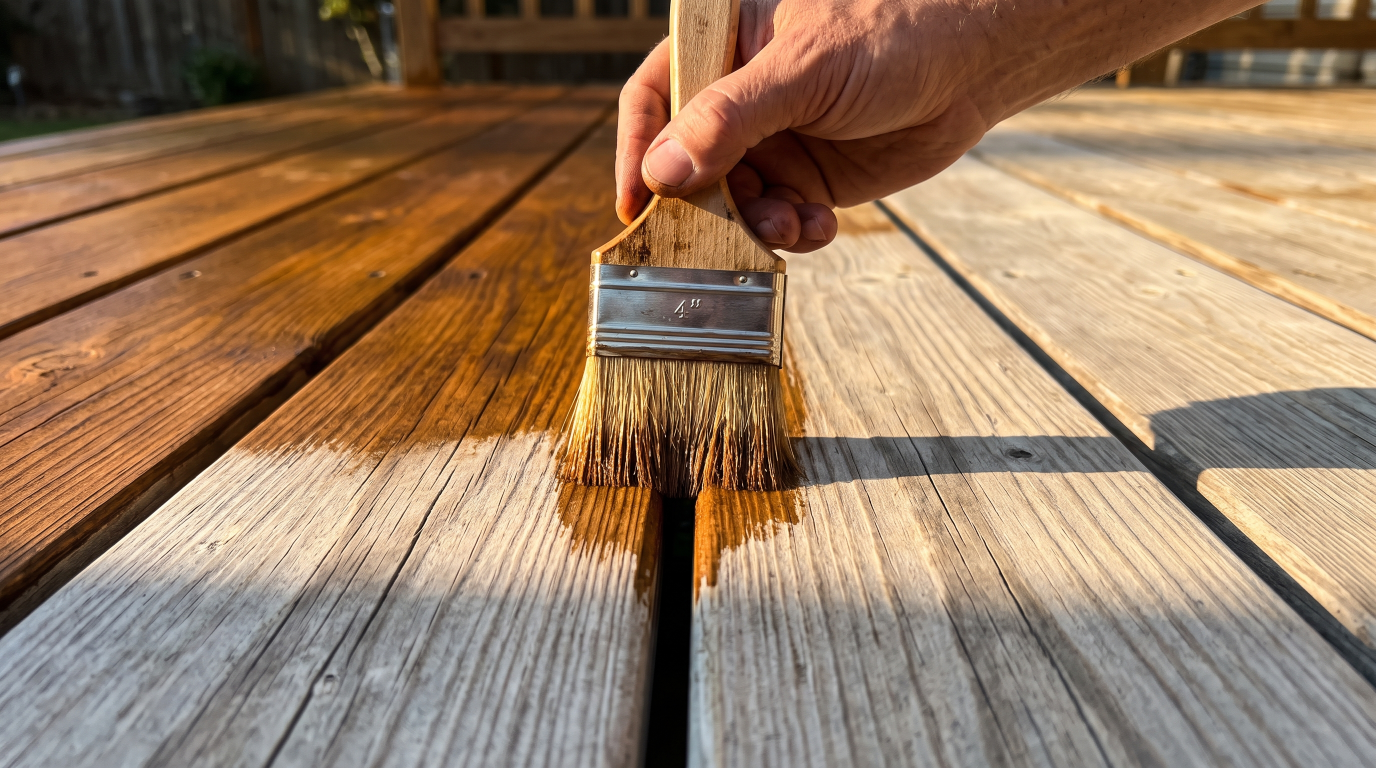
For the deck boards, the fastest good setup is a stain pad on a pole doing the spreading and a 4-inch brush riding along for the detail work. The two rules that outrank everything else:
- Work two or three boards at a time, full length, and keep a wet edge. Stopping mid-board leaves a lap mark — a dark stripe where wet stain overlapped dry — and lap marks are forever. Board by board, end to end, no coffee breaks in the middle of a board.
- Back-brush everything while it's wet. After the pad lays stain down, a pass with the brush works it into the grain and evens the film. This one habit is most of the difference between a finish that penetrated and a finish that's just lying there waiting to peel. Get the brush tip into the gaps between boards while you're at it — the board edges rot first.
And go thin. The most common deck-staining mistake is treating stain like paint and flooding it on for a richer color. Stain only protects what soaks in; anything sitting on top dries into a shiny film that foot traffic will flake off by spring. If a spot still looks wet and glossy fifteen minutes after you applied it, the wood is full — wipe the excess with a rag before it gums up. Semi-transparent stain usually wants one thin coat, maybe a second thin one on thirsty wood a couple hours later. Solid stain wants two. Nobody wants three.
Chase the shade
Even in September, don't stain a board the sun is currently roasting — follow the shade around the deck as the day moves. Morning on the west side, afternoon on the east. The stain gets its full open time to penetrate, and you get to work without frying.
Step 5
The cure: 48 hours of leaving it alone
Dry to the touch is not done. Give the deck 24 to 48 hours before regular foot traffic, 72 before the furniture comes back, and a full week before anything that sits flat and traps moisture — rugs, planters, the kiddie pool that somehow survived to September. Sliding furniture across a finish that's still curing is how brand-new stain gets its first scars, so lift, don't drag, and put felt or rubber feet under the heavy stuff while you're at it.
One dumb-but-real note: oily rags from oil-based stain can self-ignite in a pile. Lay them flat outside to dry crisp, or drown them in a water-filled metal can. It's the only genuinely dangerous thing in this entire project.
Keeping it: the once-a-year rhythm
The finish you just applied fails from the horizontal surfaces first — deck boards take the sun, the rain, and the snow shovel; railings live easy. So the maintenance rhythm is simple: wash the deck gently each spring (soap and a soft brush, not the full percarbonate treatment), then run the same water test that started all this. Beads: you're done, enjoy the season. Soaks in on the walking surfaces: those boards get a cleaning and a fresh thin coat, even if the verticals don't need anything. Catching it at year two or three is a one-day touch-up; ignoring it until the wood grays again means starting this whole article over from the top.
What not to do
- Don't stain over a finish that's still beading water. The new coat has nothing to grab and will peel in sheets. If it beads, it doesn't need stain yet — that's the test working.
- Don't trust "looks dry." Wood holds water below the surface for days after rain or washing. Staining damp wood traps moisture under the finish, which turns into blisters, then peeling, then a stripping project.
- Don't use chlorine bleach as deck cleaner. It kills mildew and also the wood's surface fibers, leaving a fuzzy, weakened layer your stain will anchor to. Percarbonate cleaners exist for a reason.
- Don't stain in direct hot sun or below 50 degrees. Hot sun flashes the surface dry before it penetrates; cold keeps it from curing at all. Check the overnight low, not just the afternoon high.
- Don't put semi-transparent over solid stain and hope. It cannot work — the pigment film blocks penetration. Over solid stain your options are more solid stain or a stripper and a long weekend.
- Don't forget the stairs get double traffic. Treads wear out twice as fast as deck boards. Give them a second thin coat while everything's out anyway.
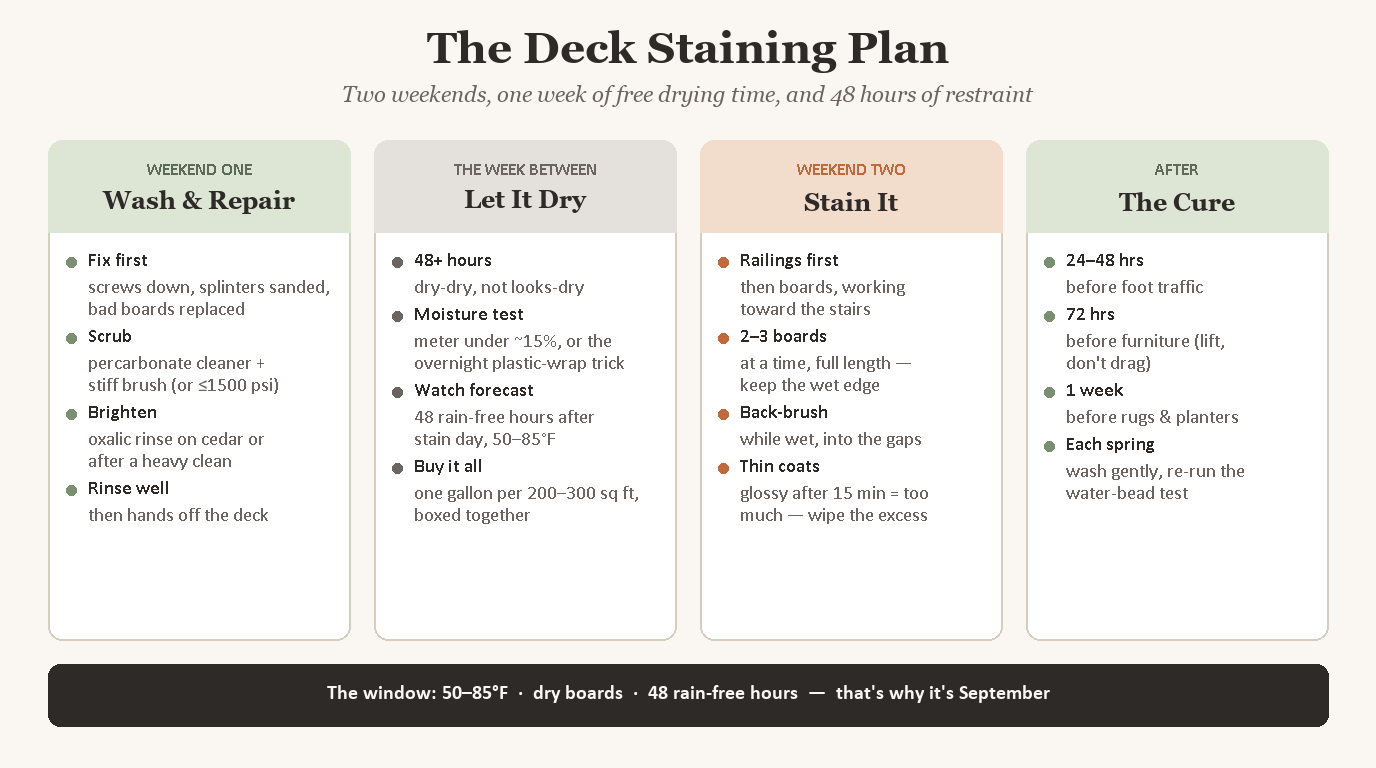
The whole plan on one card
That's the entire project: one honest weekend of prep, a week of patience you don't have to do anything for, one satisfying weekend of staining, and 48 hours of restraint. Save the card, pick your two weekends off the forecast, and the deck that spent July looking gray and thirsty spends October looking like the reason you bought the house.
And once the deck's handled, the rest of the outdoor season wind-down is coming due: the August checklist hands off to fall lawn care and gutter season this month, and if the newly gorgeous deck is making the rest of the yard look underdressed, the outdoor living upgrades and curb appeal guides are the natural next weekends. The deck took two. It'll give you back every one of them next summer.