I'll never forget the moment my toddler decided the living room wall would look better with a doorknob-sized hole in it. Hand-sized hole. Right at eye level when you walk in the room.
My first instinct? Panic. My second? Call a contractor. But then I thought—how hard could this really be? I mean, people patch drywall all the time, right?
Three hours later, standing back to admire my work—smooth, invisible repair that didn't cost me $200 in labor—I realized I'd just learned one of the most practical home maintenance skills there is. And honestly? It's way easier than I thought.
Over the years, I've patched nail holes, doorknob dents, holes from picture-hanging disasters, and yes, the occasional hole from a toddler rebellion. I've learned that the method you use matters less than the patience you bring to the job. Rush it, and you'll see the patch every time you walk in the room. Take your time, use the right technique for your hole size, and you'll forget you ever had a problem.
Here's everything I've learned about patching drywall—broken down by hole size so you can skip to what you actually need.
Assess the Damage First
The first and most important step? Figure out what you're actually dealing with. Not all holes are created equal, and the repair method that works for a nail hole will leave a medium-sized hole looking worse.
Small holes are anything under 1/2 inch. Think nail holes, screw holes, tiny dents from furniture. These are the easiest fixes and the ones that take the least time.
Medium holes range from 1/2 inch to about 6 inches. Doorknob dents, fist-sized holes (yes, that's a real problem), holes from removing shelving hardware. These need a slightly different approach but are still totally DIY-friendly.
Large holes are anything bigger than 6 inches. These might seem intimidating, but they're actually not as scary as they sound. You're just replacing a section of drywall, which is a straightforward (if slightly more involved) process.
Pro Tip
Take a photo of your hole before you start. Seriously. When you're comparing before and after, you'll be shocked at how invisible your repair actually is. Plus, it's satisfying photographic evidence of your DIY prowess.
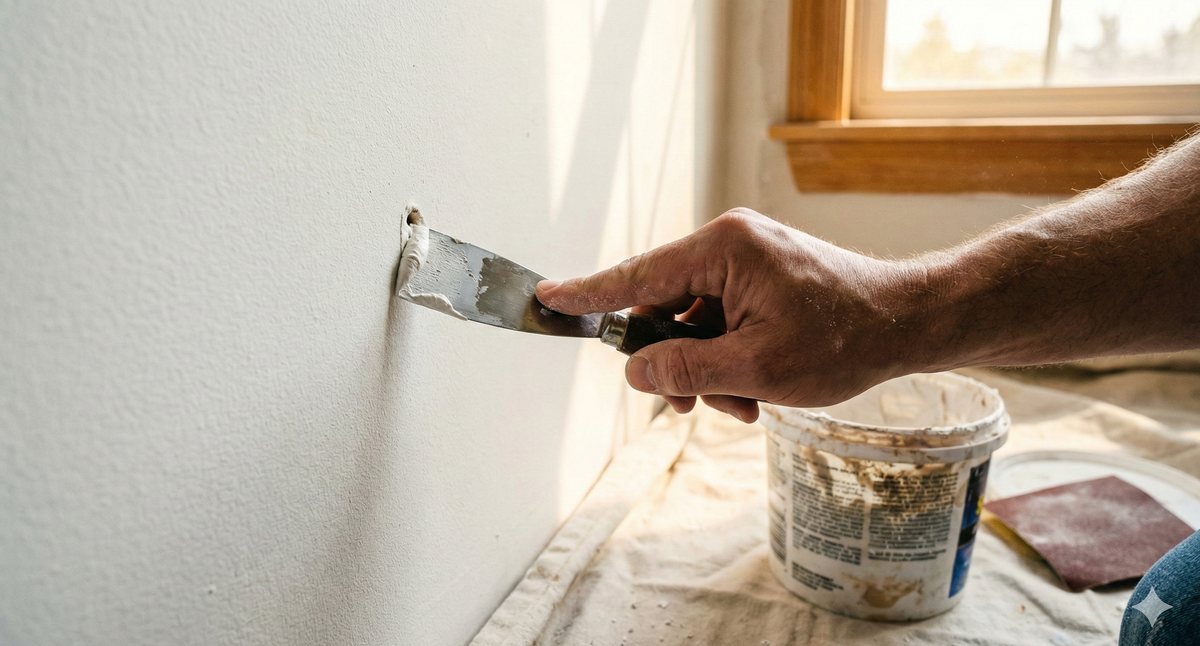
Method 1: Small Holes (Spackle Repair)
Small holes are the gateway drug to drywall patching. They're easy, fast, and they give you the confidence to tackle bigger jobs.
What You'll Need
Small Hole Repair Kit
- Spackling compound (also called spackle)
- 2-inch putty knife
- Sandpaper (120-grit and 220-grit)
- Primer and matching paint
- Small brush or foam applicator
- Damp cloth for cleanup
Step-by-Step Process
Step 1: Clean the hole. Use your putty knife or a wire brush to scrape away any loose drywall, dust, or debris. You want a clean surface for the spackle to grip. If the hole has rough edges, lightly sand them smooth—this takes about 10 seconds and makes a huge difference.
Step 2: Apply spackle. Load your putty knife with spackle (about 1/4 inch thick) and apply it to the hole, pressing firmly to fill it completely. I like to overfill slightly because spackle shrinks as it dries. Smooth it out and feather the edges a bit—this just means making the spackle a slightly thinner layer at the edges so there's less of a bump to sand down later.
Step 3: Let it dry. Check your spackle package for drying time. Standard spackle takes 1-2 hours. Quick-drying versions can be done in 20-30 minutes, which is why I usually buy the quick-dry stuff.
Step 4: Sand smooth. This is where the magic happens. Use 120-grit sandpaper first, sanding in circular motions until the patched area is level with the surrounding wall. You're looking for smooth—not shiny, just smooth. Light dust everywhere is normal; wipe it away with a damp cloth.
Step 5: Second coat (if needed). If your patch still isn't perfectly smooth or level, apply another thin layer of spackle and repeat the drying and sanding process. I usually need two coats for anything bigger than a dime.
Step 6: Prime and paint. Once everything is smooth and dry, apply a coat of primer to the patched area. This seals the spackle and helps the paint adhere better. Then paint with your matching wall color.
Common Mistake
Don't skip the primer step. Spackle absorbs paint differently than drywall, and without primer, your patch will look like a slightly different shade forever. Primer is cheap insurance.
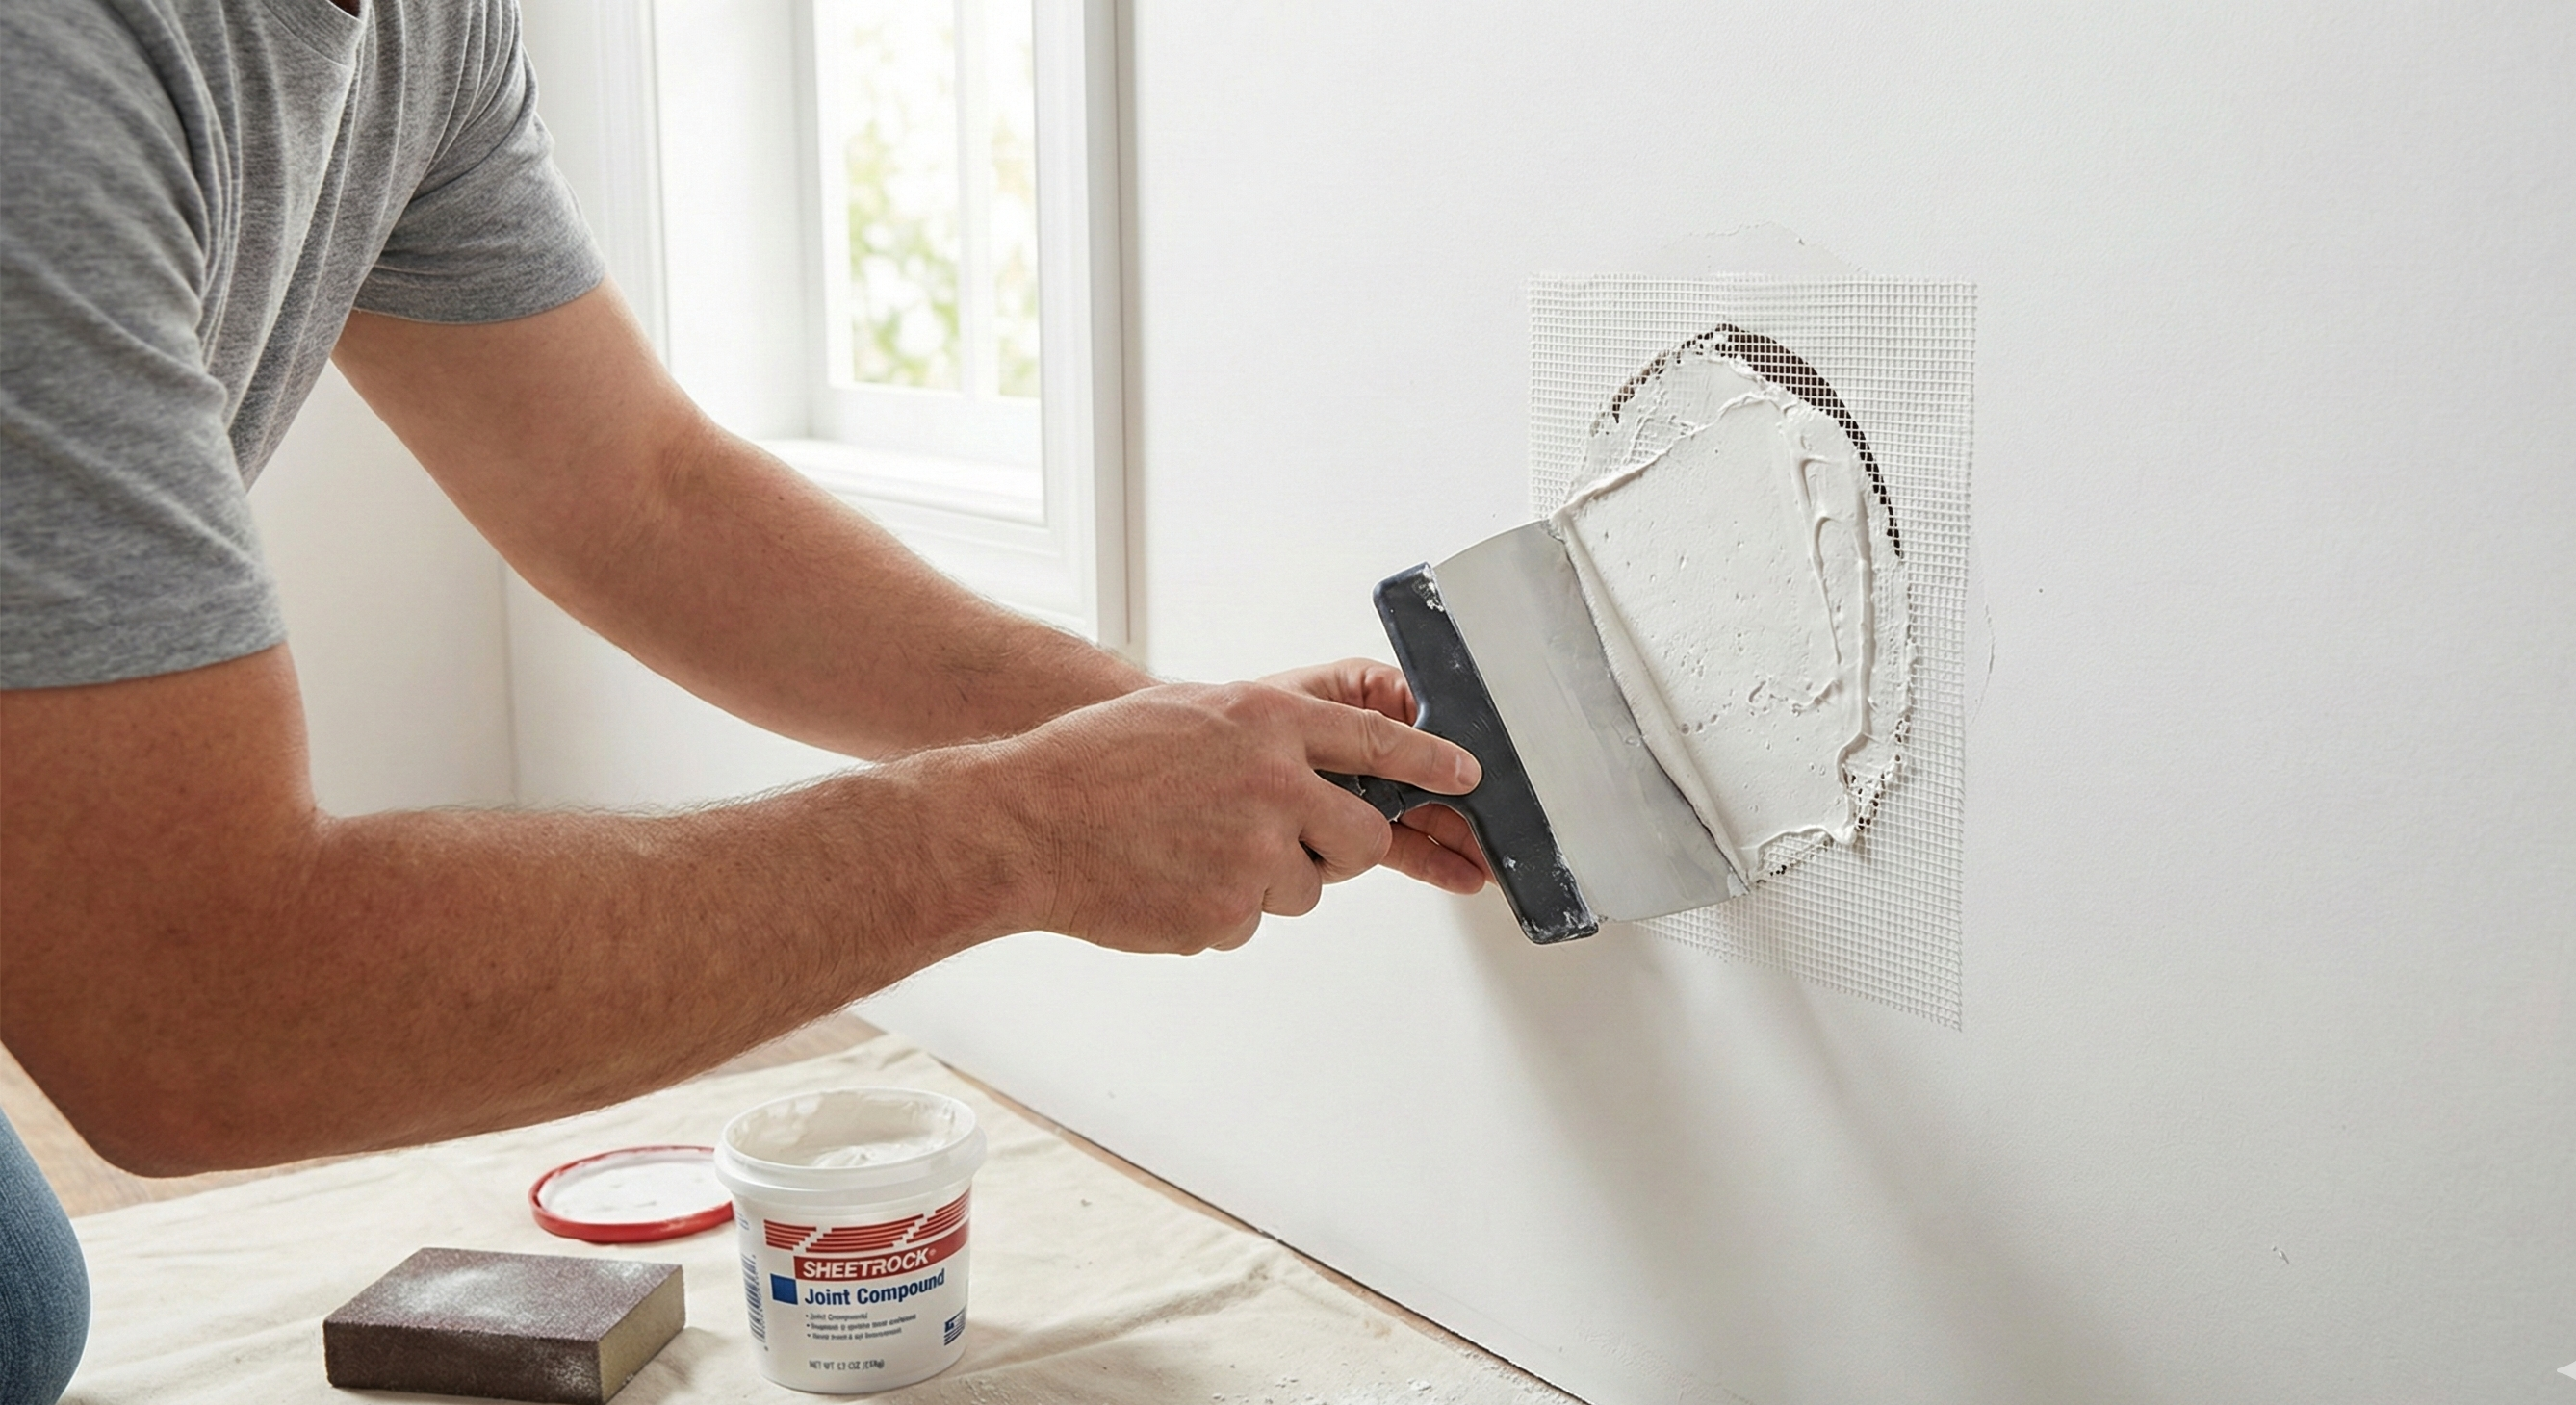
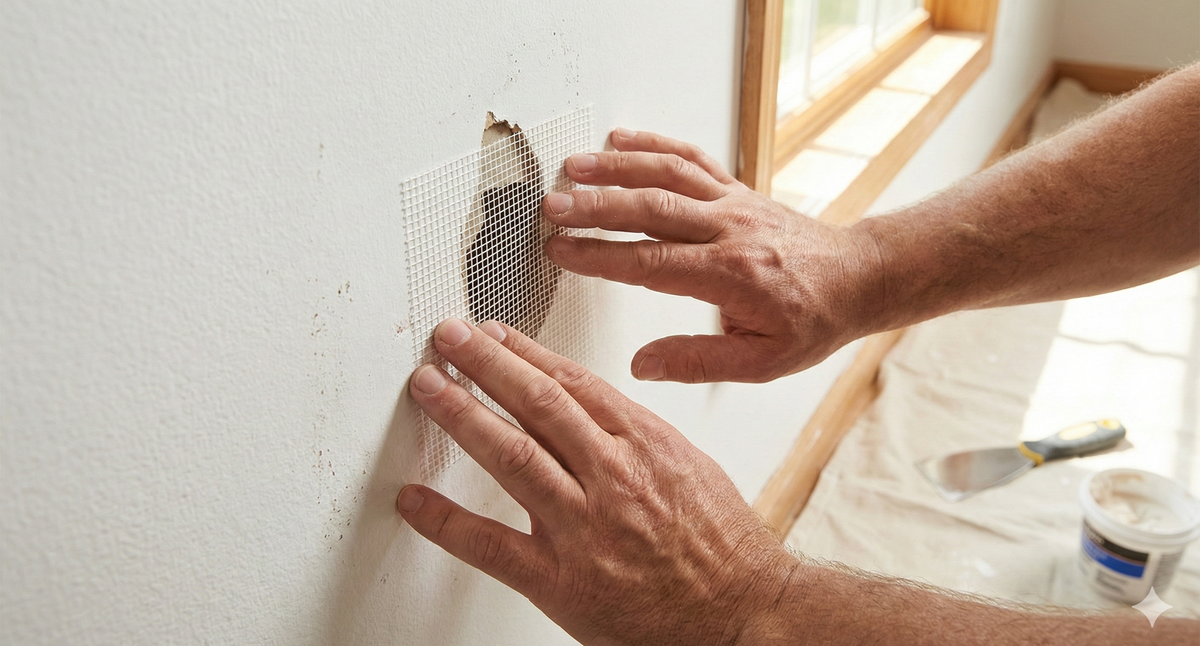
Method 2: Medium Holes (Mesh Patch Method)
The self-adhesive mesh patch was a game-changer for me. It's faster than spackle for anything over about an inch, and it's nearly foolproof. I honestly don't know why more people don't use these things.
What You'll Need
Medium Hole Repair Kit
- Self-adhesive drywall patch (mesh or fiberglass)
- Joint compound (drywall mud)
- 4-6 inch taping knife
- Sandpaper (120-grit and 220-grit)
- Primer and matching paint
- Brush or roller for paint
Step-by-Step Process
Step 1: Clean and prep. Just like with small holes, clean away any loose debris, dust, or damaged drywall. Make sure the area around the hole is clean and smooth.
Step 2: Apply the mesh patch. Peel the backing off your self-adhesive mesh patch and center it over the hole. Press it firmly, working from the center outward to eliminate air bubbles. These patches are forgiving—they'll stick to wall texture and stick around until you paint.
Step 3: Apply joint compound. Using your taping knife, apply a thin layer of joint compound over the patch, feathering the edges out 2-3 inches beyond the patch. You're looking for thin and smooth—this isn't a thick paste.
Step 4: Let it dry. Joint compound typically takes 24 hours to fully dry. Yes, that's longer than spackle. But your patience will pay off in a better-looking repair.
Step 5: Sand and repeat (if needed). Once dry, sand smooth with 120-grit sandpaper. If you see low spots or the patch edges are still visible, apply another thin coat of joint compound, let it dry, and sand again. Two coats is typical for medium holes.
Step 6: Prime and paint. Prime the entire patched area and surrounding drywall (feather the primer out a bit too), then paint with your matching wall color.
Why Joint Compound Instead of Spackle?
Spackle is great for filling small holes because it dries fast. But for larger repairs where you need to feather edges and potentially do multiple coats, joint compound is your friend. It's slightly more forgiving, shrinks less, and creates a more invisible finish.
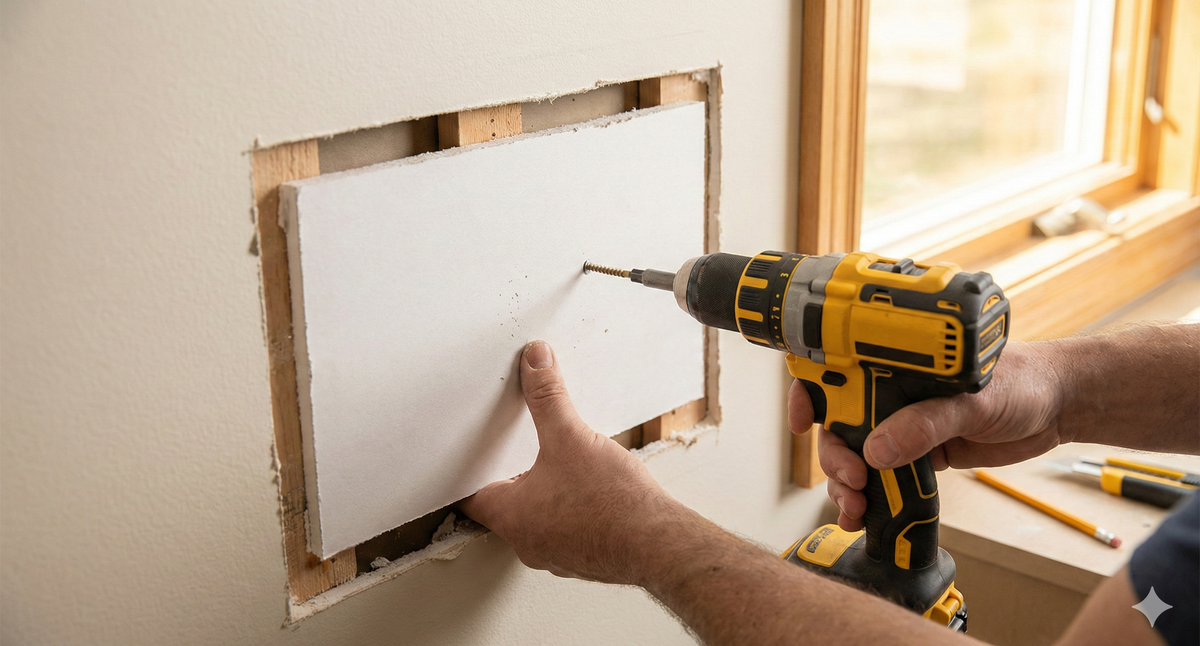
Method 3: Large Holes (Patch Replacement)
If you have a hole bigger than 6 inches, you're not filling it anymore—you're replacing a section of drywall. This sounds more complicated than it is, and honestly, it's a satisfying repair to tackle.
What You'll Need
Large Hole Repair Kit
- Drywall saw or utility knife
- Drywall patch (cut to size or pre-made patch kit)
- Wooden backing strips (1x2 or 1x3 lumber)
- Drywall screws (1-1/4 inch)
- Drill/driver
- Joint compound and taping knife
- Drywall tape (optional, for corner seams)
- Sandpaper and primer/paint
Step-by-Step Process
Step 1: Mark a square around the damage. Using a utility knife and a straight edge, mark a square or rectangle that encompasses the entire hole. Make sure you're staying away from studs if possible—they're harder to cut through. Your patch can be any size, but square or rectangular patches are easiest to work with.
Step 2: Cut out the damaged area. Using a drywall saw (which looks like a small keyhole saw), cut along your marked lines to remove the damaged section. You should now have a square or rectangular opening in your wall.
Step 3: Install backing strips. This is crucial. Inside the hole, you need to install wooden backing (called "nailers") for the new drywall to attach to. Cut 1x2 or 1x3 lumber to fit inside the hole. You'll install them perpendicular to the hole opening, kind of like creating a frame. The backing strips should sit about 1/2 inch inside the hole opening so you have something to screw the new patch into. Use construction adhesive and nails or screws to secure them.
Step 4: Cut and fit the patch. Measure your hole opening and cut a piece of drywall to fit. It should fit snugly but not so tight that it's hard to insert. If you're nervous about measuring, use your first attempt as a template.
Step 5: Screw the patch in place. Insert the drywall patch and secure it with 1-1/4 inch drywall screws. Space them about 6 inches apart around the perimeter. Screw them in so they're slightly recessed (maybe 1/32 inch below the surface)—this is where your compound will go.
Step 6: Apply joint compound. Using your taping knife, apply a thin layer of joint compound over all the seams and screw holes. If your patch lines up with studs or existing drywall, you may want to use drywall tape (the mesh tape, not painter's tape) under your compound for extra strength.
Step 7: Sand, repeat, prime, and paint. Let the compound dry, sand smooth, and apply another coat if needed. Then prime and paint like you did with the smaller repairs.
When to Call a Pro
If your large hole is near an electrical outlet, light switch, or stud location, consider calling a professional. These complications are beyond basic DIY, and messing them up can be costly or unsafe.
Sanding and Finishing: The Invisible Repair
Here's the secret to repairs that actually look invisible: proper sanding and feathering. This is where people usually rush, and it shows.
Feathering is extending your joint compound or spackle well beyond the original hole—sometimes 8-12 inches in each direction. This creates a gradual slope from your patch to the undamaged wall, so when you sand it smooth, the transition is nearly undetectable. Thin layers feather better than thick ones, which is why I always say thin coats for the outer layers.
Sanding technique matters more than you'd think. Use circular motions with 120-grit sandpaper to knock down the compound, then finish with 220-grit for a smooth surface. Don't sand aggressively—you're removing high spots, not trying to sand the patch flat to the wall. Let the sandpaper do the work.
Pro tip: Sand in good lighting and feel the patch with your hand often. Your fingers are better at detecting high spots and low spots than your eyes are. If you hit a low spot during sanding, you'll need another thin coat of compound.
Matching Paint: The Trickiest Part
Here's an uncomfortable truth: matching paint is harder than patching drywall. Paint fades over time, and if your walls are a few years old, your "exact match" from the paint store might not look exact at all.
Your best bet is to get a sample of your current wall paint. Scrape a small area with a plastic scraper to get a paint chip (one that includes all layers if the wall has been repainted), then bring it to the paint store for matching. They can scan it and mix paint to match.
When you're painting, feather your paint too. Don't just paint the patch—paint a larger area so the whole section blends together. Start at the patch and work outward, thinning the paint as you go. This is especially important if your wall has texture or if you're trying to hide variations in paint color.
A few coats of primer before your final paint coat will help hide the patch even more. And don't forget to paint in good lighting—what looks perfect in your living room lamp might look terrible in natural light.
Common Mistakes (And How to Avoid Them)
Mistake #1: Not letting things dry. I get it—you want to finish the job. But compound and paint need time to dry properly. Rushing this step is the #1 reason repairs look bad. Set a timer, do something else, and come back when it's dry.
Mistake #2: Using too much spackle or compound. Thick layers shrink more and crack more easily. Thin layers with multiple coats will look better and last longer. I usually tell people to use maybe 1/8 inch on outer coats.
Mistake #3: Not feathering edges. Wide feathering is your best friend. The wider you feather, the less obvious the repair. Go bigger than you think you need to.
Mistake #4: Skipping primer. Spackle and joint compound take paint differently than drywall. Primer creates a uniform surface and prevents your patch from looking slightly different in color or sheen.
Mistake #5: Not sanding between coats. Light sanding between coats helps the next coat stick better and creates a smoother final surface. A quick sand with 220-grit takes 2 minutes and makes a big difference.
Mistake #6: Using the wrong compound for the job. Lightweight joint compound and quick-setting spackle are different products. Use spackle for small holes, joint compound for larger patches. Trying to use spackle for a medium-sized hole will just frustrate you.
Frequently Asked Questions
Spackle is lighter, dries faster (1-2 hours for standard, 20-30 minutes for quick-dry), and shrinks less. It's perfect for small holes because it fills them completely and dries quickly. Joint compound (or "mud") is thicker, takes longer to dry (typically 24 hours), and works better for larger repairs where you need to apply multiple thin coats. You can feather compound much further than spackle.
Small holes (spackle): 1-2 hours including drying time. Medium holes (mesh patch): 2-3 hours of active work, but you'll need to wait 24 hours for compound to dry fully. Large holes (replacement): 3-4 hours of active work, plus 24+ hours for compound drying. Total project time depends heavily on how much time you spend waiting for things to dry.
Never. Always wait for spackling compound and joint compound to dry completely before painting. Painting over wet compound traps moisture, which can cause the compound to bubble, crack, or fail. Standard spackle and compound typically need 24 hours to fully cure, though quick-setting products can dry in 1-2 hours. Check your specific product for timing.
This usually means one of three things: (1) Your edges weren't feathered far enough—try feathering 12+ inches next time. (2) Your paint doesn't match the wall color—get a paint sample from the wall and have it matched at the store. (3) The patch isn't sanded smooth—sand again and repaint. If the patch is slightly raised, you can also try a light sand with 220-grit paper and another coat of paint.
Not really. For small and medium holes, you just need putty knives, sandpaper, and spackling compound—all under $20 total. For larger holes, you'll want a drywall saw (about $15) and a drill/driver (which most people already have). None of these tools are specialized or expensive, and they're useful for dozens of other projects.
Patience. Use thin layers instead of thick ones, feather your edges wide (8-12+ inches), sand between coats, prime before painting, and match your paint carefully. Rush any of these steps and the patch will be obvious. Take your time and nobody will ever know your wall was damaged.